You map Salesforce objects to Anaplan modules to move data between the two platforms.
To create a Salesforce import integration:
- Enter a new Integration name.
Use a unique name of up to 60 characters that starts and ends with a letter or number. Letters used must be in the Latin alphabet . You can include spaces, hyphens (-), and underscores (_), but no other special characters. - Select Salesforce from the Connection dropdown.
- Select your Workspace from the dropdown.
- Select your Model from the dropdown.
- Select the Action type: Import.
- Select the Salesforce Data type, either Object or Report.
- Select Import from the Action dropdown.
- Select your Data source from the dropdown.
- Select Next.
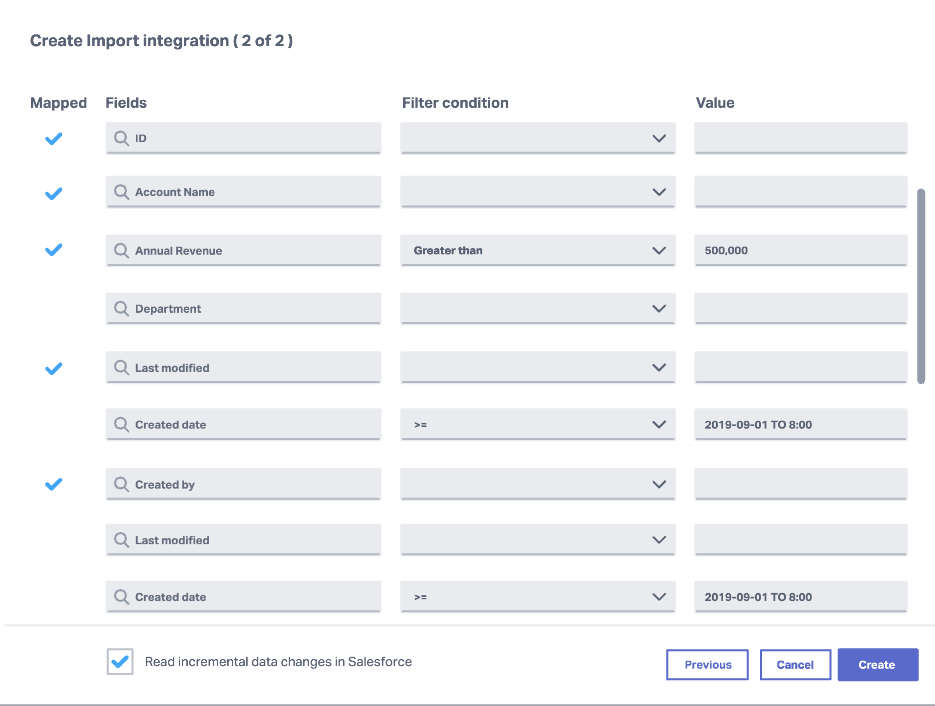
The Mapping dialog opens. - Map the Fields to the Values and add the Filter condition to relate them.
See the table below to help you map. - Select Create.
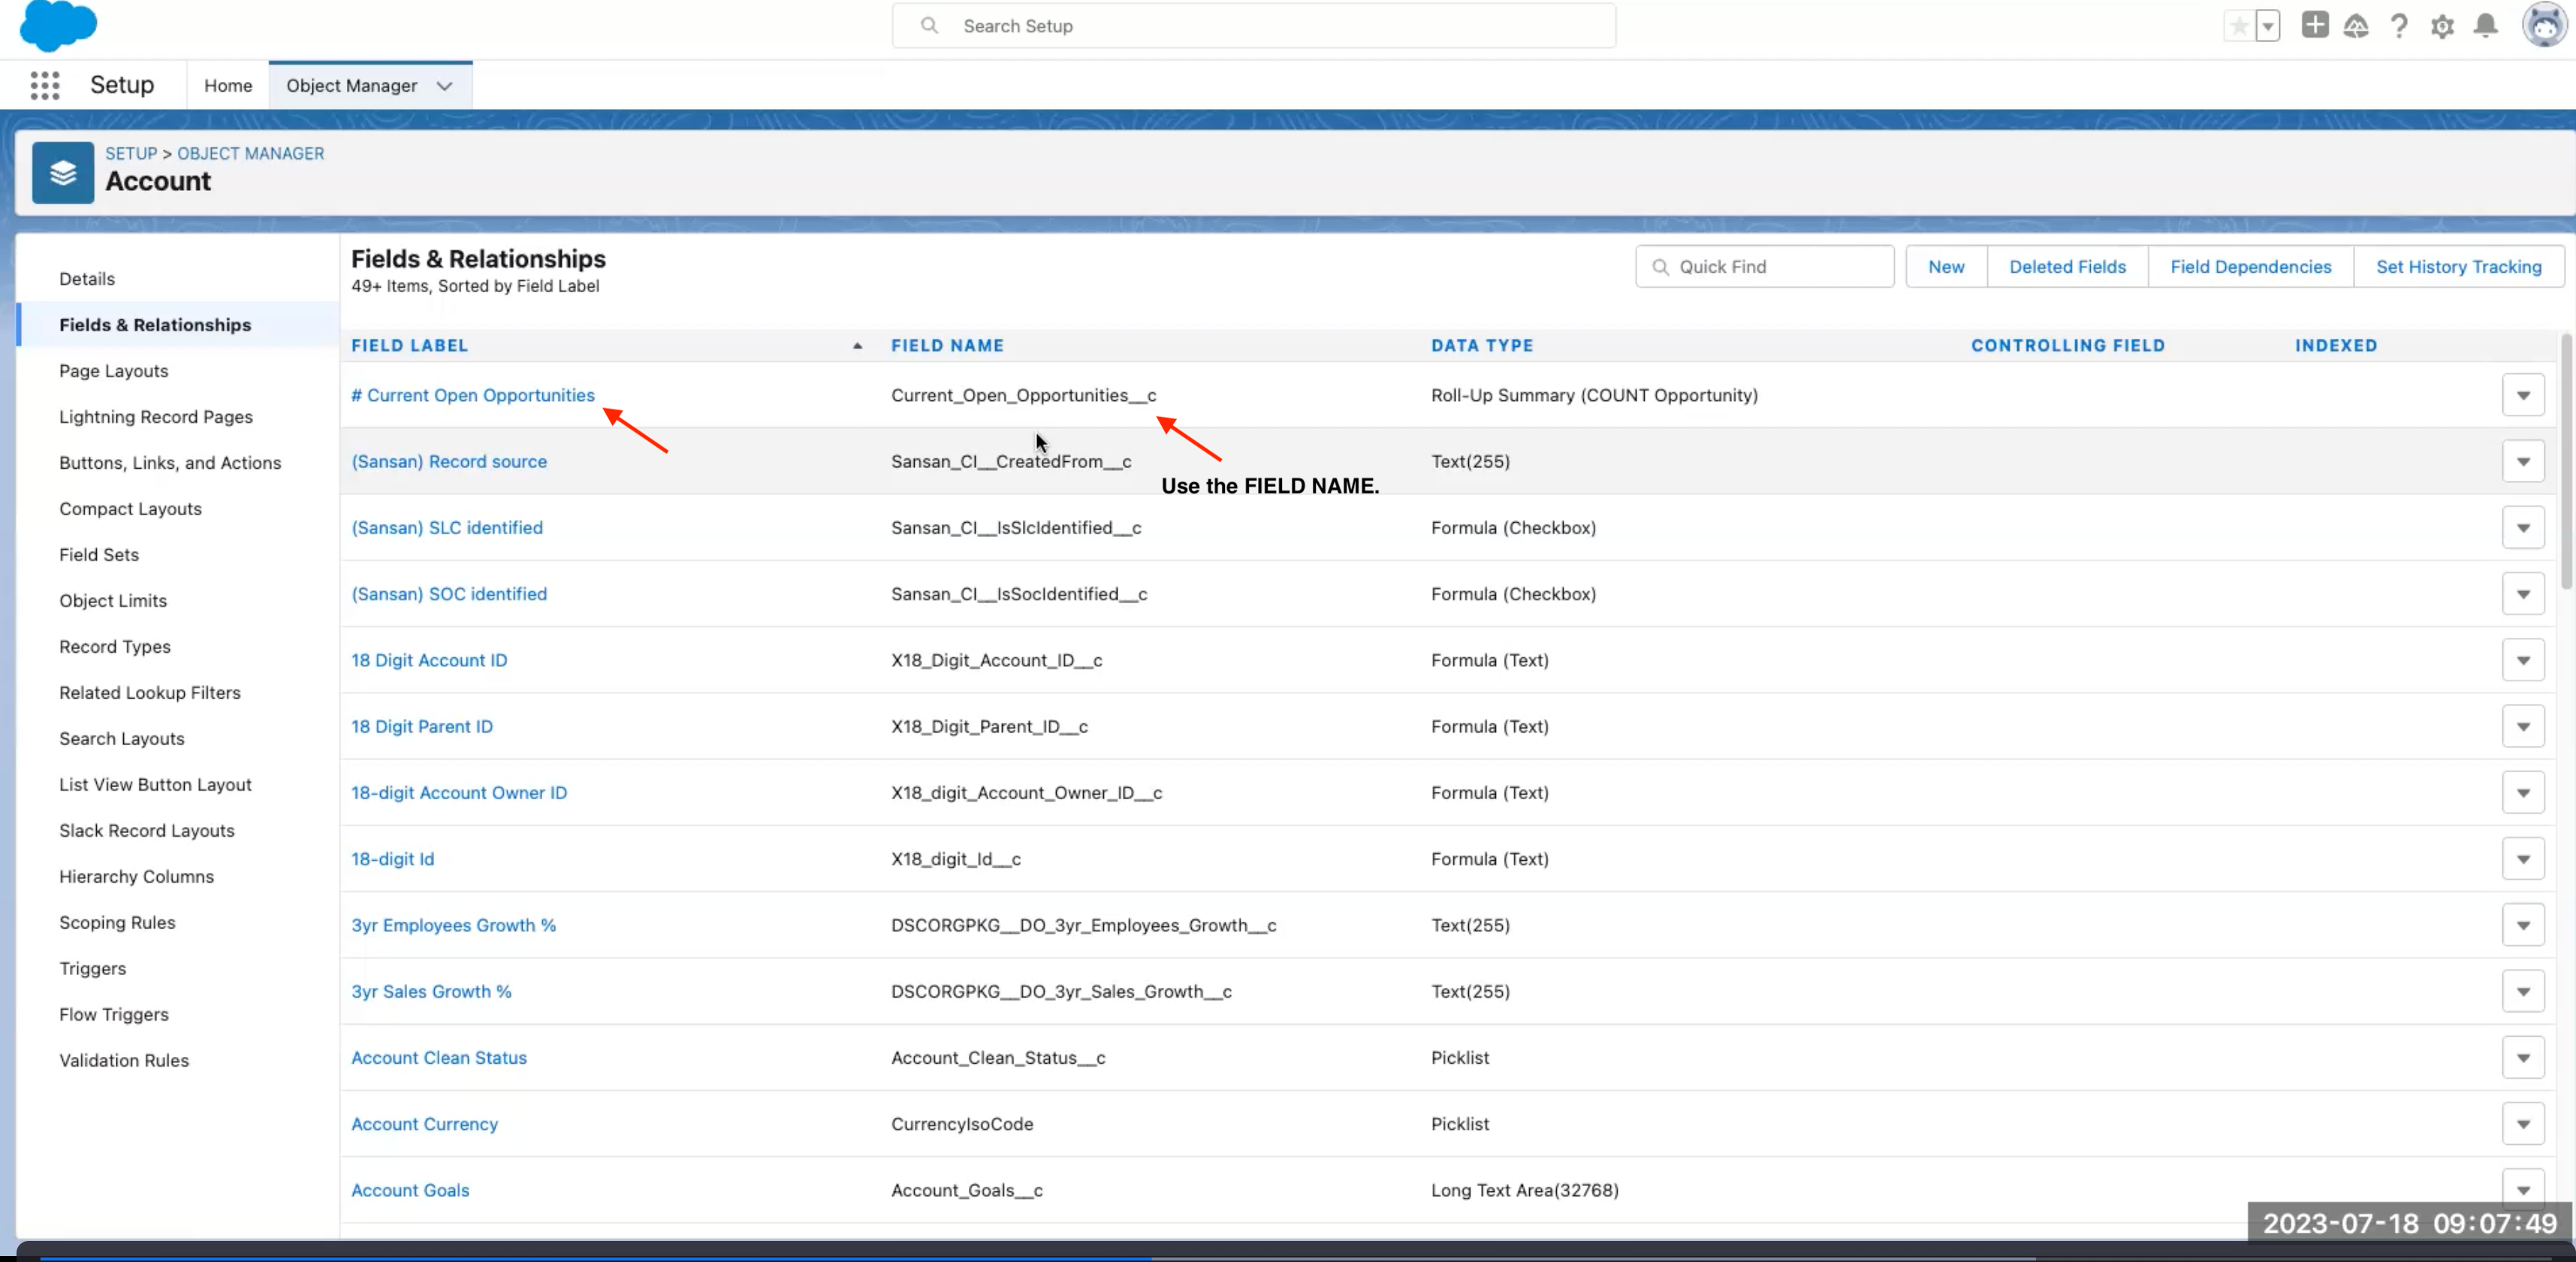
Within your Anaplan module, you must match line item column headers to your Salesforce field names. When these match, the Salesforce object Anaplan line item imports successfully. To identify the Anaplan line item within Salesforce:
- Select the gear icon and Setup (setup for current app) from the dropdown.
- Beneath Objects and Fields, select Object Manager.
- Select this object for which to discover the API names (in this example the name is
Account). - Beneath Details select Fields & Relationships.
- Select the FIELD NAME. Note that these entries all contain
_underscores_.
In the screenshot below, the example is:Current_Open_Opportunties_c.
Also see: How to configure Salesforce for an integration with CloudWorks .
Example: Salesforce Fields & Relationships
Boolean actions and input values
| Filters | Input values |
| Booleans we support: > greater than < less than >= greater than or equal <= less than or equal | Use numbers only. |
| = equals != not equal | The values must be true/false. |
| FLOAT | Use numbers only. |
| DATE | Use valid date format: YYYY-MM-DD. |
| DATETIME | Use valid time stamp format: YYYY-MM-DDTHH:MM:SS+HH:MM. |
| STRING | Use valid string format. Example: ActM7#2X%d&F. |
| LIKE | Use valid wildcard string format. Examples: Sales%, Sales_. |
To create a Salesforce export integration:
- Refer to steps 1–4 above.
- Select the Action type: Export.
- Select your Action from the dropdown.
- Select your Data target from the dropdown.
- Check the box Make this available on User Experience action cards if you want colleagues to be able to run this export.
- Select Next.
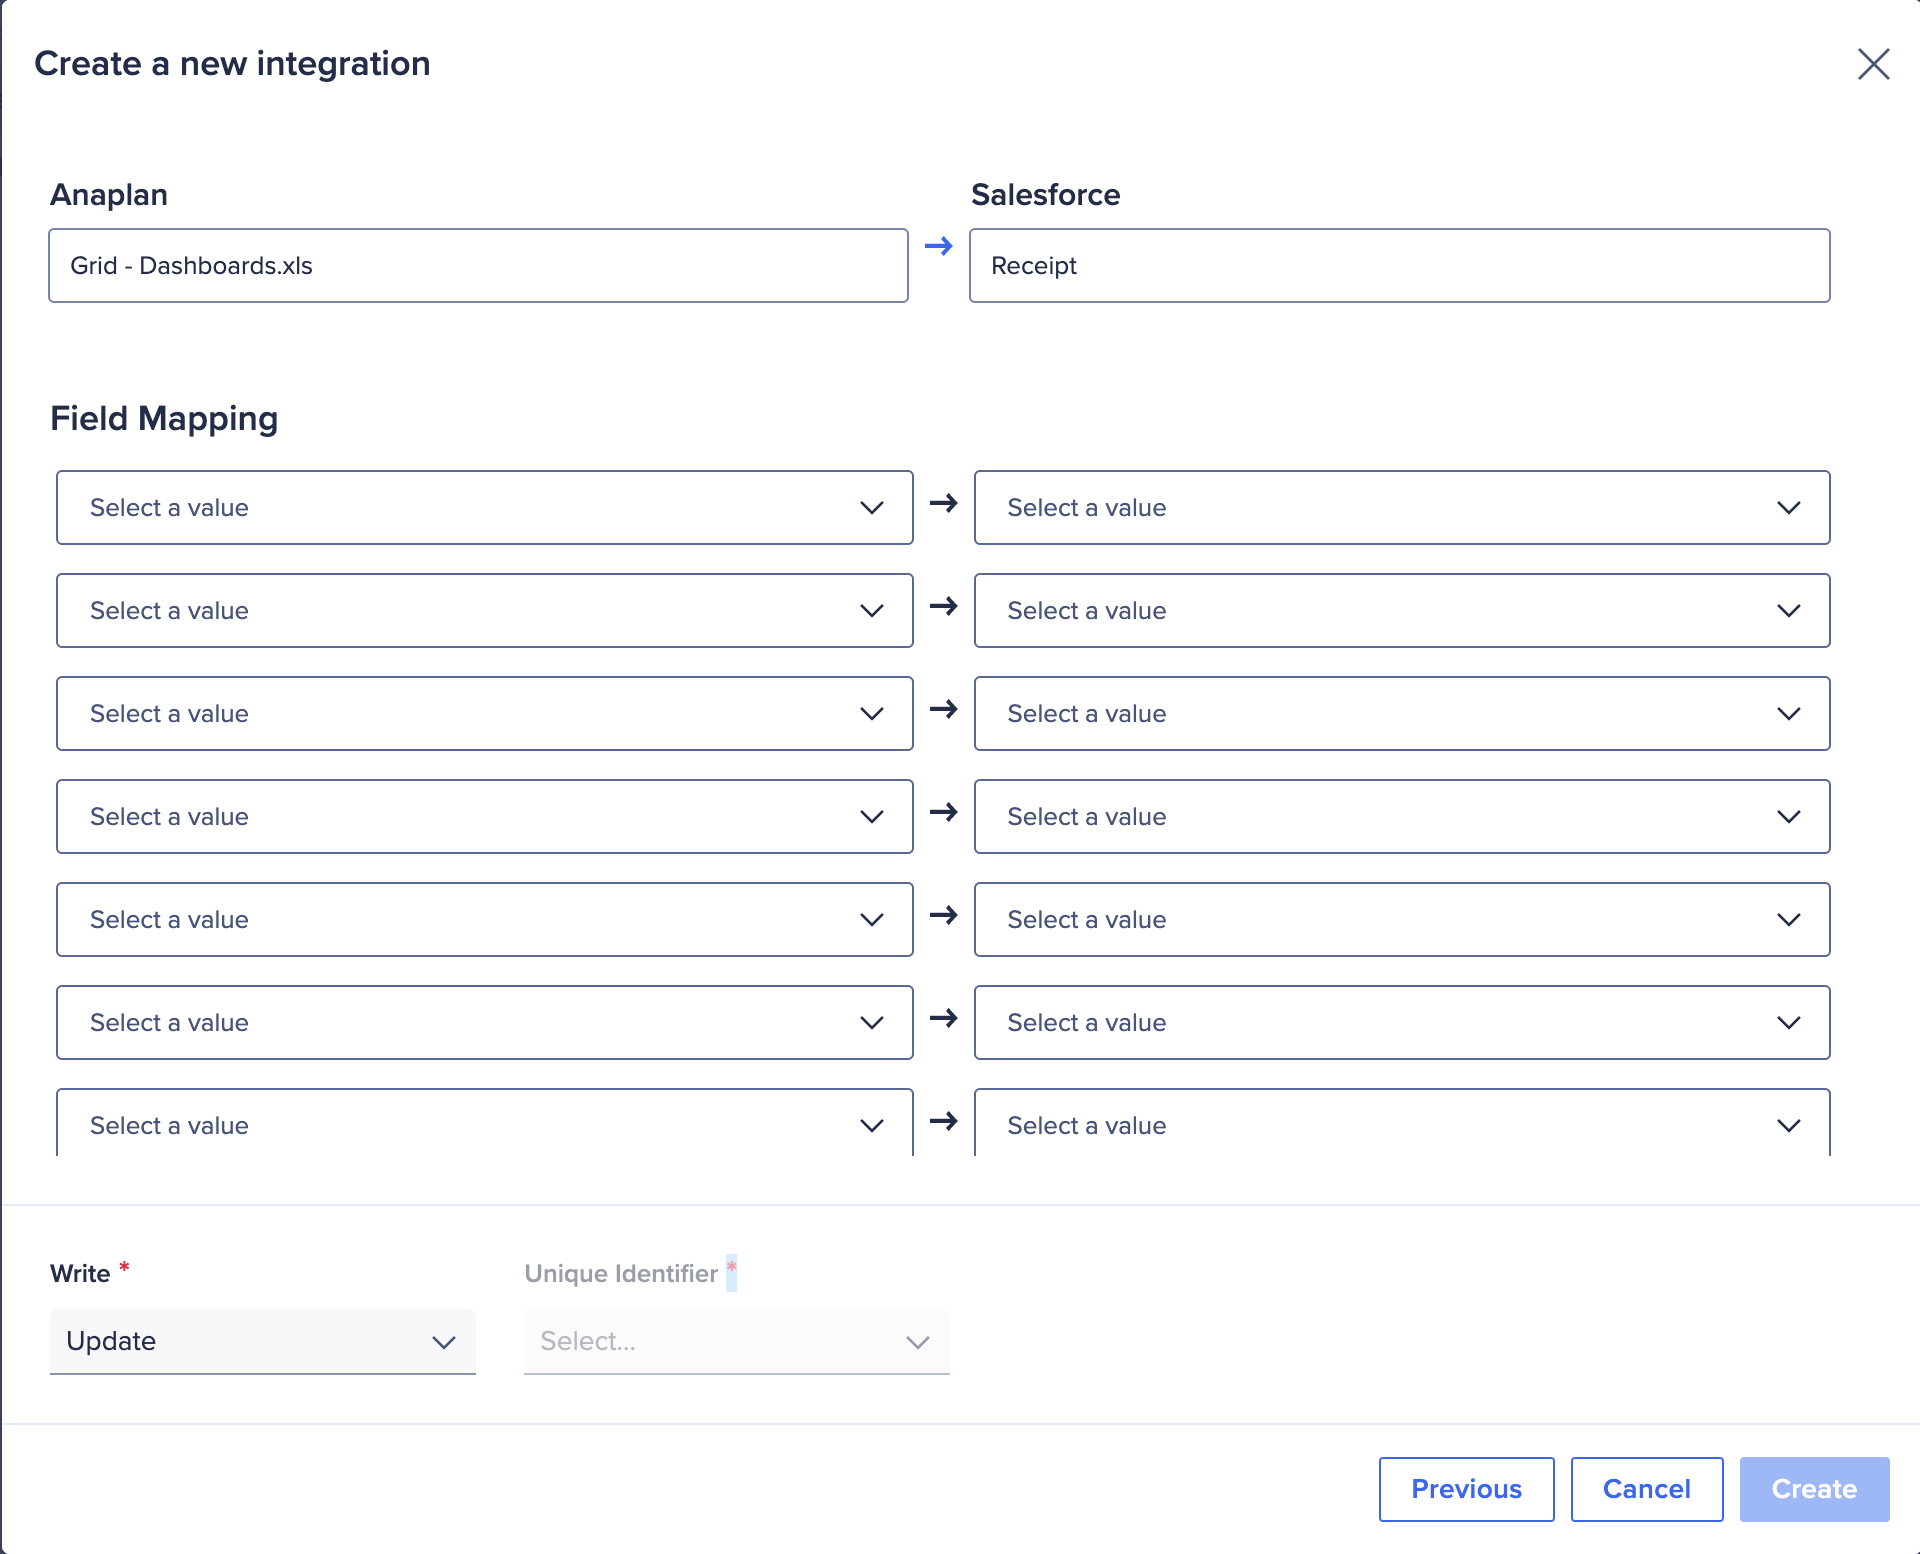
The Mapping dialog opens. - Map the Field Mapping dropdowns to the Salesforce dropdowns.
- Select from the Write dropdown.
- Select from the Unique Identifier dropdown.
- Select Create.