When you link grids together, a driving grid may return no data. This results in the default member of the linked dimension being returned to the secondary grid. At times, you may want the secondary grid to display no data rather than display the data based on the default member for the driving grid.
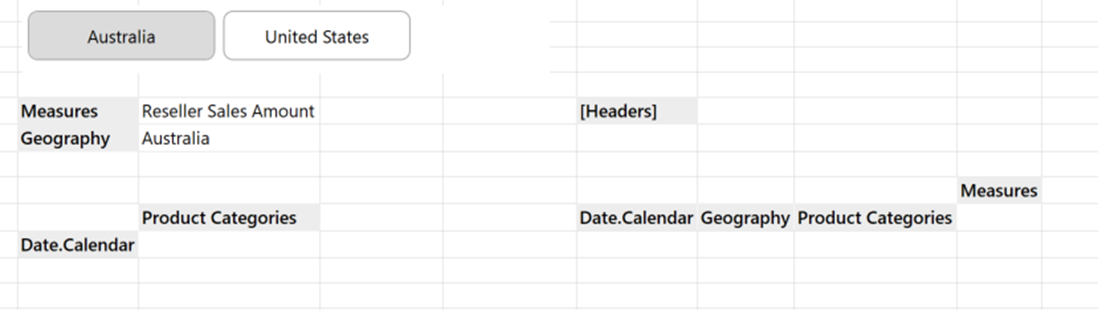
In this example, there are two linked grids:
The Date. Calendar are chosen within the Grid Designer.
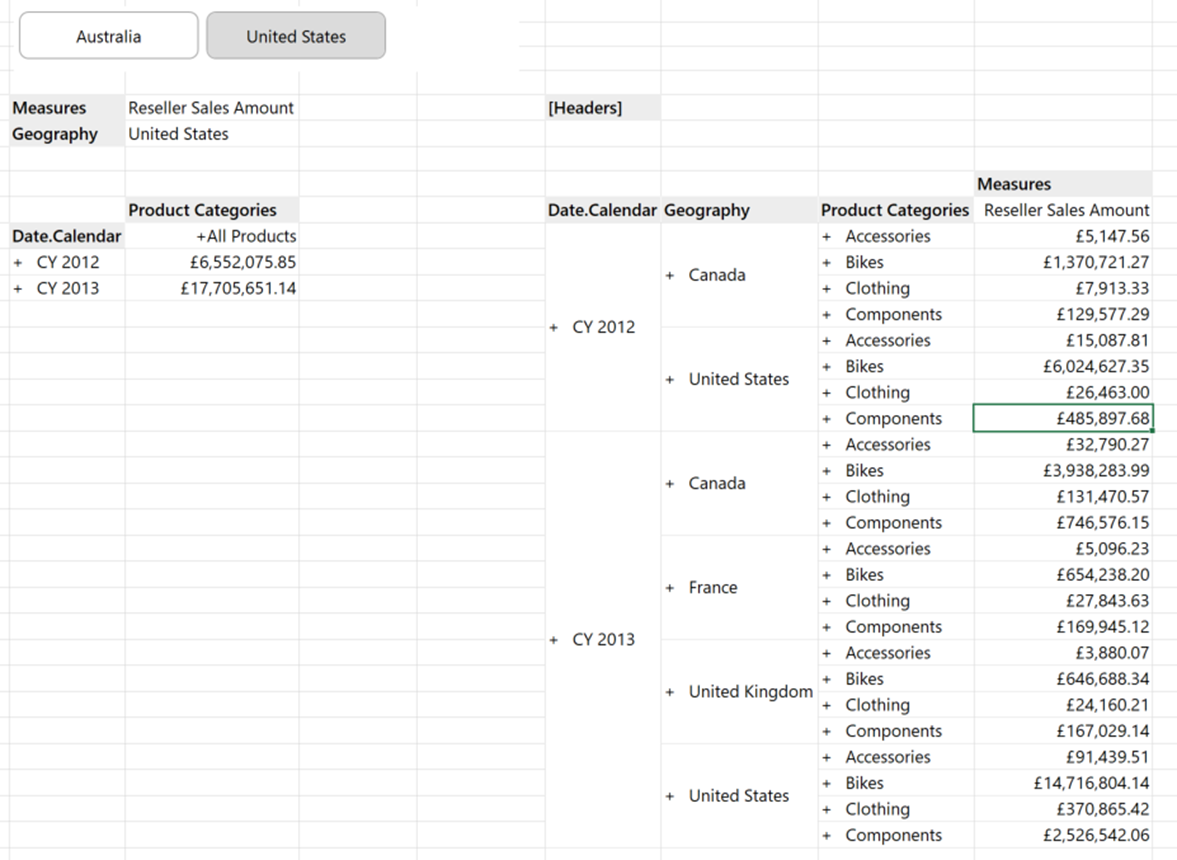
If you select Australia, there is no data for CY 2012 or CY 2013, so the linked grid receives the default member: All Periods
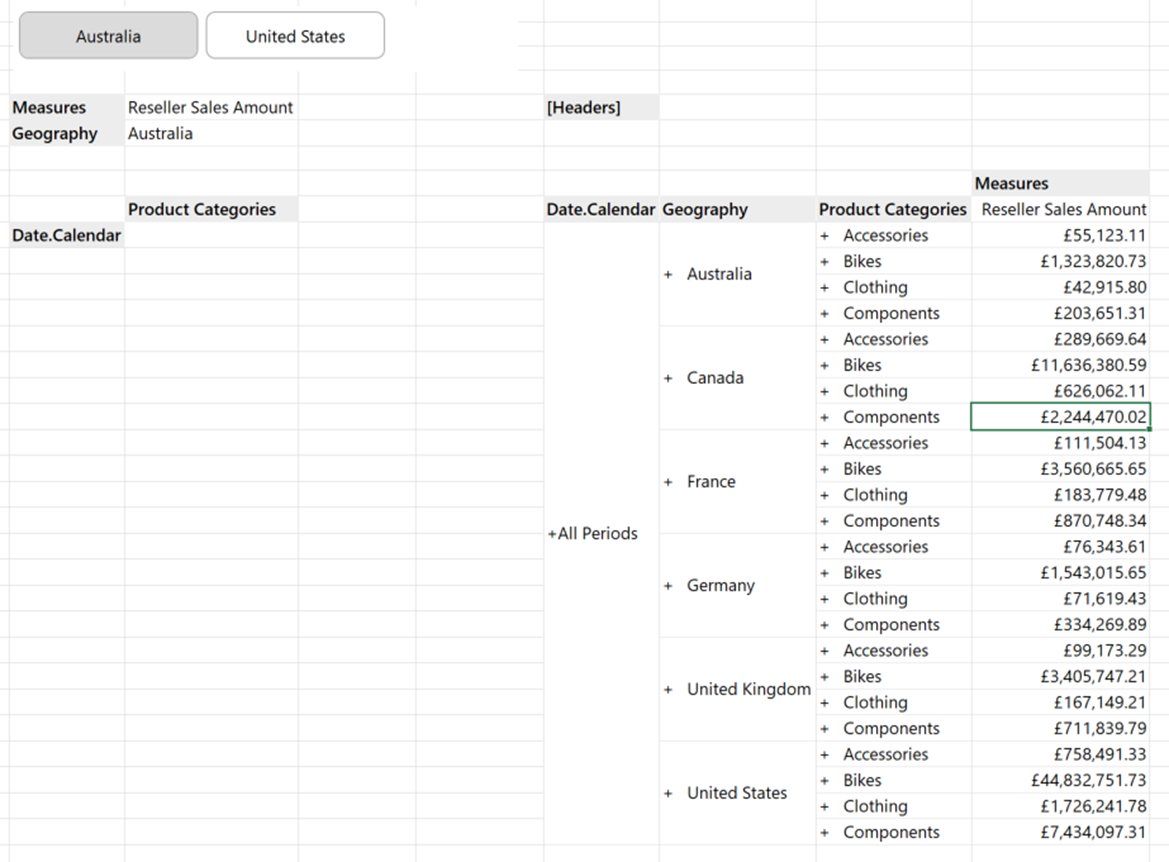
Really what we want to happen is for the linked grid not to display anything if the default member is returned to it.
This can be achieved from the Grid Designer.
Select the linked dimension, which in this example is Date.Calendar, and go to the Advanced tab:
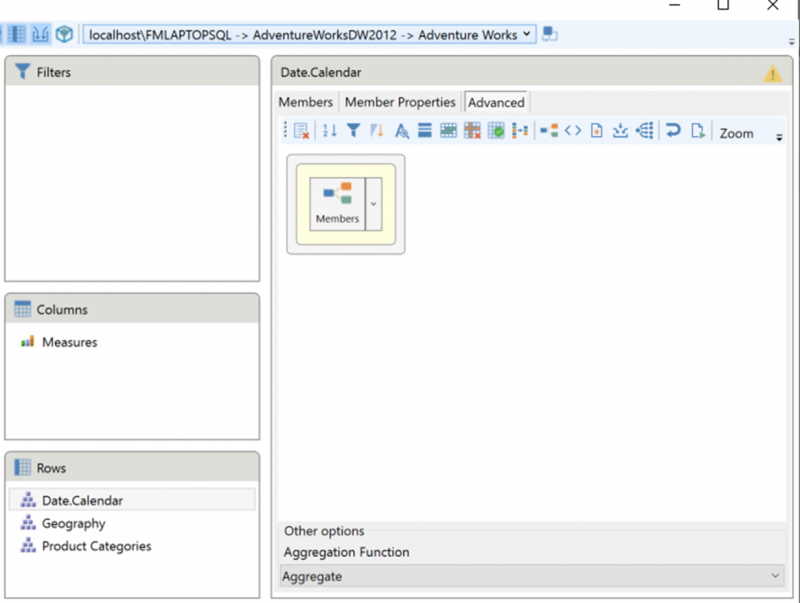
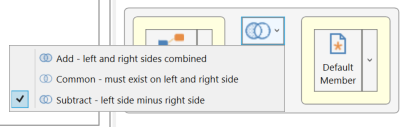
See the screen capture below:
- Select the Member Lists button
- Select the Default Member button
- Select the middle element and remove it.

Set the Subtract option:
Finally, click OK on the Grid Designer form.
This means that when the default member is returned by the empty grid to the linked grid, the default member will be removed from the list: