You must add historical data from a source module to your data collection. It's the only mandatory data for the collection.
To set up a data collection with historical data:
- In Forecaster, select Data collections.
- Select New data collection in the upper right of the screen.
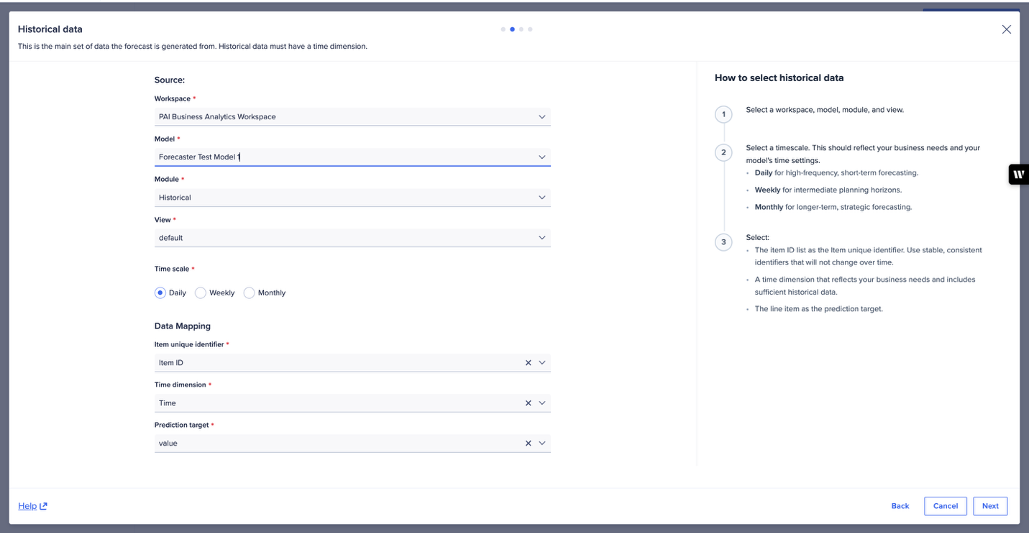
- In the Historical data panel, enter your Data collection name.
- Beneath Source, select the workspace, model, module, and the view that contains the historical data.
- Select the time scale that complements the time settings (either built-in or custom time dimension) in your model or module.
- Beneath Data mapping, verify that these fields auto-mapped correctly.
If the mapping doesn't match, you can override it manually.- Item ID list as the Item unique identifier.
- Time as the Time dimension.
- The line item as the Prediction target.
Notes:
The timescale of your related data must be the same as in your historical data. The same time scale carries into your forecasts.
There should only be one line item for the target time series in your module. If you configured an exclude values line item, Forecaster applies it automatically. See Exclude values for details.
- If you only want to use historical data, select Create data collection (bottom right of the screen). This triggers data collection creation. You can check the status on the Data collections page. Optionally, you can add related data and/or add attributes.
Example of Forecaster historical data module, with dimensions: