

This guide helps you to diagnose and fix Fluence Excel Add-in issues. Learn how to verify the add-in is installed and enabled, configure Excel Trust Center settings, add the Fluence domain to Windows Trusted Sites, and clear the Click-Once cache.
To install the Fluence Add-in, see the Fluence Add-in Installation Guide.
Excel options and Trust Center settings can interfere with the Fluence Add-in (or other installed add-ins). Verify the following Excel options and Trust Center settings.
Excel Add-ins
To verify that the Fluence Add-in is installed and enabled, review the add-ins under Options in Excel:
- In Excel, open the File menu and select Options.
- In the Options dialog, select Add-ins.
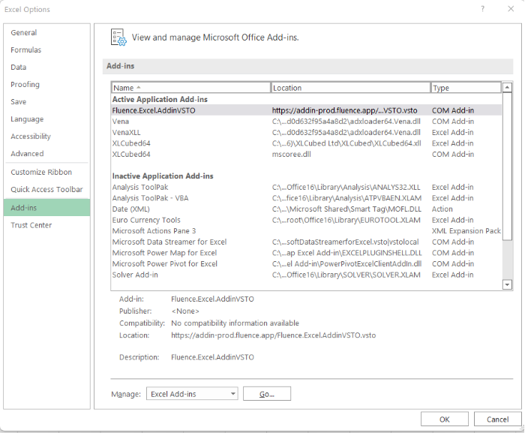
Disabled Excel Add-ins
Excel may disable the Fluence Add-in on rare occasions, such as when Excel shuts down unexpectedly. To re-enable the Fluence Add-in:
- In Excel, open the File menu and select Options.
- In the Options dialog, select Add-ins.
- Select Disabled Items from the Manage drop-down list, then select Go.
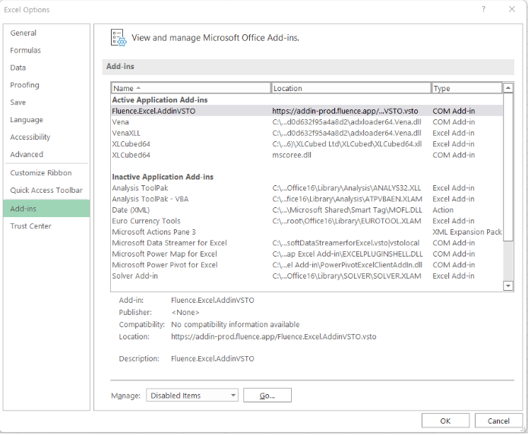
- Select the Fluence Add-in in the Disabled Items dialog, select Enable, then select Close.
Excel COM Add-ins
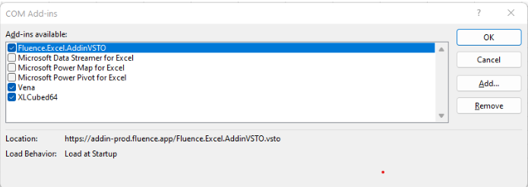
If the Fluence Add-in no longer appears or was disabled, verify that it is enabled in COM Add-ins. At the bottom of the dialog, open the Manage dropdown, select COM Add-ins, and select Go.
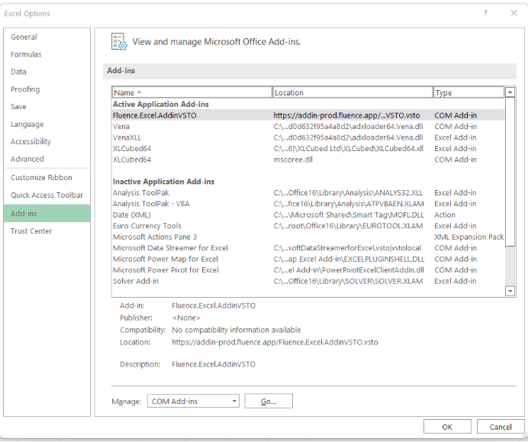
Ensure that the Fluence Add-in is checked.
Excel - Trust Center
- In Excel, open the File menu and select Options.
- In the Options dialog, select Trust Center.
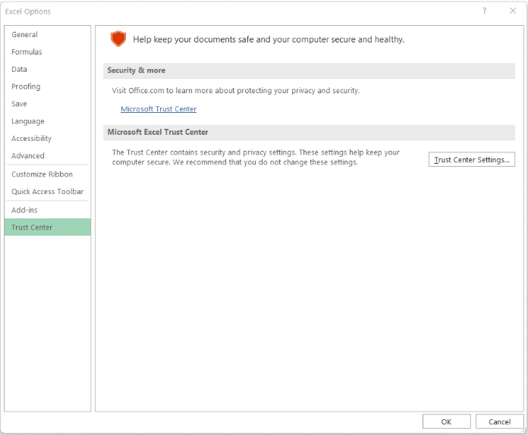
- Select Trust Center Settings, then select OK.
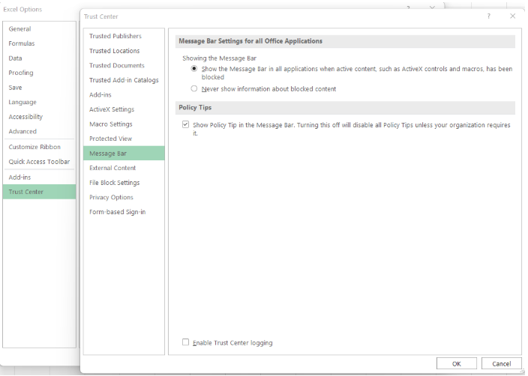
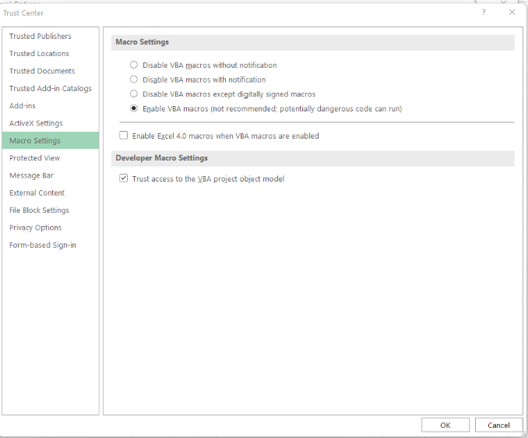
Excel - Trust Center settings - Enable macros
- In the Trust Center dialog, select Macro Settings.
- In the Macro Settings section, select Enable all macros (not recommended...).
- Check the box beside Trust access to the VBA project object model.
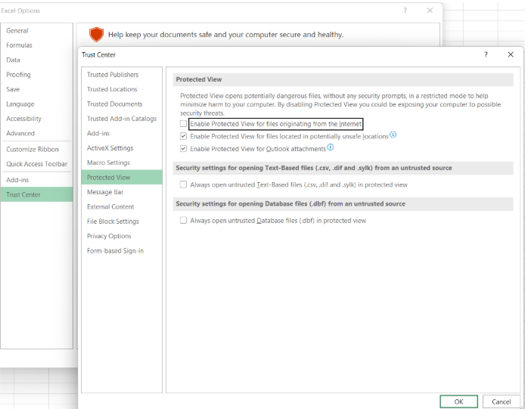
Excel - Trust Center settings - Enable Protected View
In the Trust Center dialog, select Protected View.
Depending on your Windows security settings, the Protected View options in Excel can cause problems with Fluence forms and processes.
- If you encounter Protected View issues, uncheck Enable Protected View for files originating from the Internet.
- Keep Enable Protected View for files located in potentially unsafe locations checked.
Excel - Trust Center settings - Add-ins
In the Trust Center dialog, select Add-ins. Make sure Disable all Application Add-ins isn't checked.
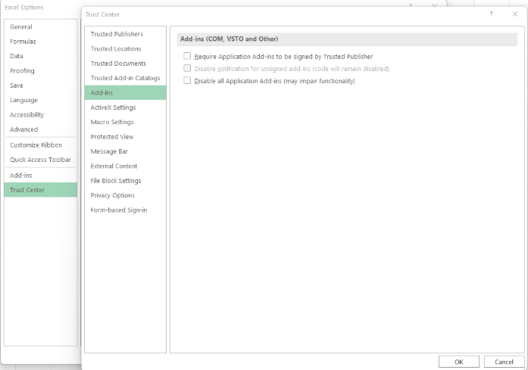
Excel - Trust Center settings - Add-ins and Trusted Publisher
Change the Trust Center settings for Add-ins if you encounter this error during install: The solution cannot be installed because it is signed by a publisher whom you have not yet chosen to trust. If you trust the publisher, add the certificate to the Trusted Publisher list.
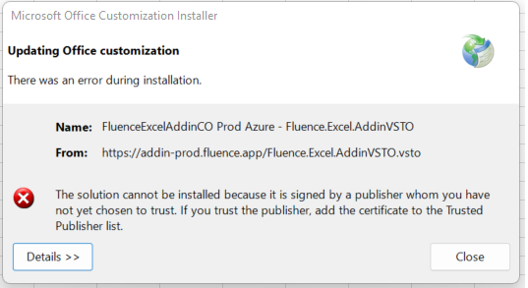
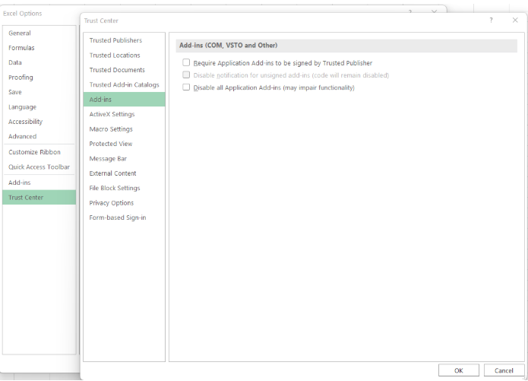
In the Trust Center dialog, select Add-ins, and uncheck Require Application Add-ins to be signed by Trusted Publisher.
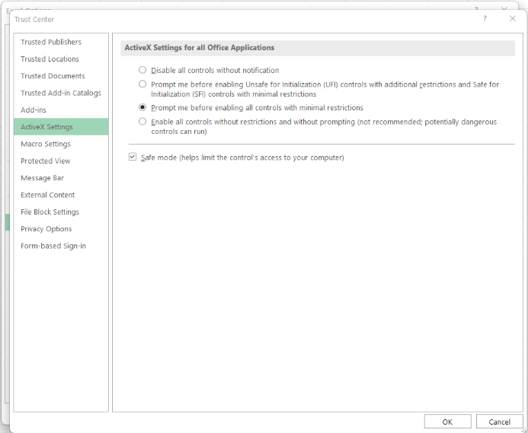
Excel - Trust Center settings - ActiveX settings
Select ActiveX Settings, then select Prompt me before enabling all controls with minimal restrictions. Also check the box Safe mode (helps limit the control’s access to your computer).
Trusted Sites
The Fluence Add-in requires *.fluence.app in the Trusted Sites list.
If you do not add the *.fluence.app domain to Trusted Sites, you may see errors:
- Security Mismatched Zone errors when you install the Fluence Add-in. Running some Fluence processes may also fail.
- No View Model found for the workbook error dialog in a Fluence Form.
- The No View Model found for the workbook error can also relate to Protected View settings in Excel.
Checking trusted sites
To view Trusted Sites settings, select Internet Options from the Windows Control Panel, or type Internet Options in the Windows Search bar.
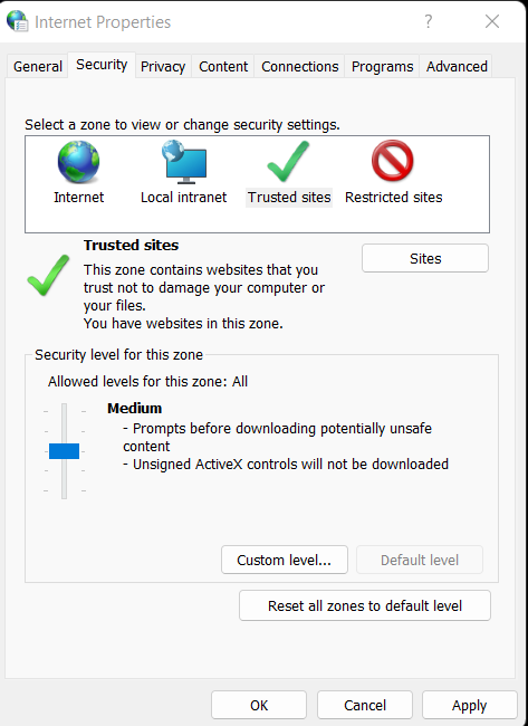
- Select the Security tab, then select Trusted Sites.
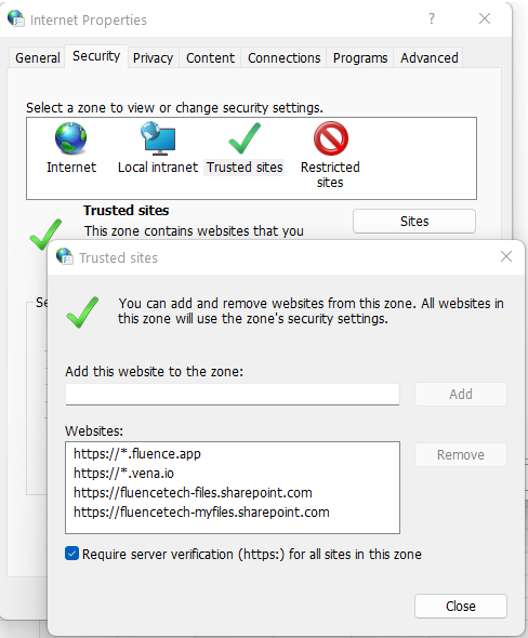
Add the URL https://*.fluence.app to the zone, select Close, then select Apply in the Internet Properties dialog.
Corporate IT policies may control whether you can modify Trusted Sites. If the Add button stays grey when you try to add a Trusted Site, contact your corporate IT team for help.
Checking trusted sites with Registry Editor
An alternate method to view Trusted Site entries in Windows is the Registry Editor. Use this method only to view entries. Make changes through IT or the Security tab in Internet Options.
- From the Windows Start menu, search for Registry Editor and run it. Registry Editor requires elevated rights, and some corporate IT restrictions may block it.
- Navigate to
Computer\HKEY_CURRENT_USER\Software\Microsoft\Windows\CurrentVersion\Internet Settings\ZoneMap\Domains
The Trusted Sites list appears.
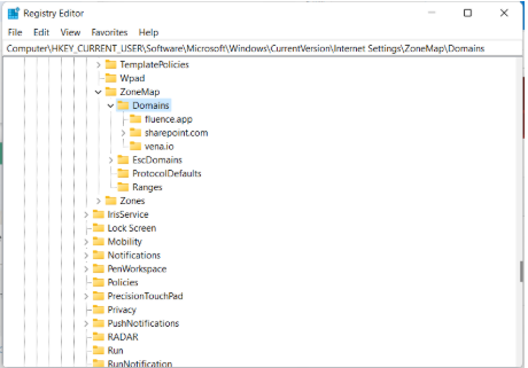
If the entry for fluence.app (and vena.io, if applicable) doesn't appear, contact your IT department.
Fluence Add-in install errors
Microsoft ClickOnce cache clearing
The Fluence Add-in install uses Microsoft’s ClickOnce deployment mechanism built into .NET. If the ClickOnce cache is corrupted in Windows, you may need to clear it. This requires registry access, so perform it with IT assistance.
To clear the ClickOnce cache:
- Under the main ClickOnce folder structure, delete any folders or files that begin with the letters flue:
c:\Users\<UserName>\AppData\Local\Apps\2.0\
Other ClickOnce installs share this directory. Deleting other files and folders may require you to reinstall affected applications.
For example, under the directory:
c:\Users\<UserName>\AppData\Local\Apps\2.0\6J597B4T.8V6\9M5PYVP2.VQG\flue...dll_29c72e9e2bdfb7b4_0016.0006_none_ed19d757eaa66620flue..vsto_29c72e9e2bdfb7b4_0016.0006_c0be9ae54d368299
Remove those directories and any other directories or files that start with flue.
2. In the registry, ClickOnce entries are placed in:
Computer\HKEY_CLASSES_ROOT\Software\Microsoft\Windows\CurrentVersion\Deployment\SideBySide\2.0\Components\
Remove any keys or entries that start with the letters flue.
For example, these 4 entries may exist:
flue...dll_29c72e9e2bdfb7b4_0016.0006_none_ed19d757eaa66620flue..vsto_29c72e9e2bdfb7b4_0016.0006_8ee661082eca1407flue..vsto_29c72e9e2bdfb7b4_0016.0006_c0be9ae54d368flue..vsto_29c72e9e2bdfb7b4_0016.0006_none_a3b45290eb0dc3b9299
3. Delete all registry keys that start with flue in this registry section.
4. Retry the ClickOnce VSTO install.

