

A Delay task pauses the execution of the workflow for a brief period. Use this task to delay the the start of another task to allow for a process to complete.
For example, use this task to add a 1 minute delay before calling another task to allow a calculation to complete.
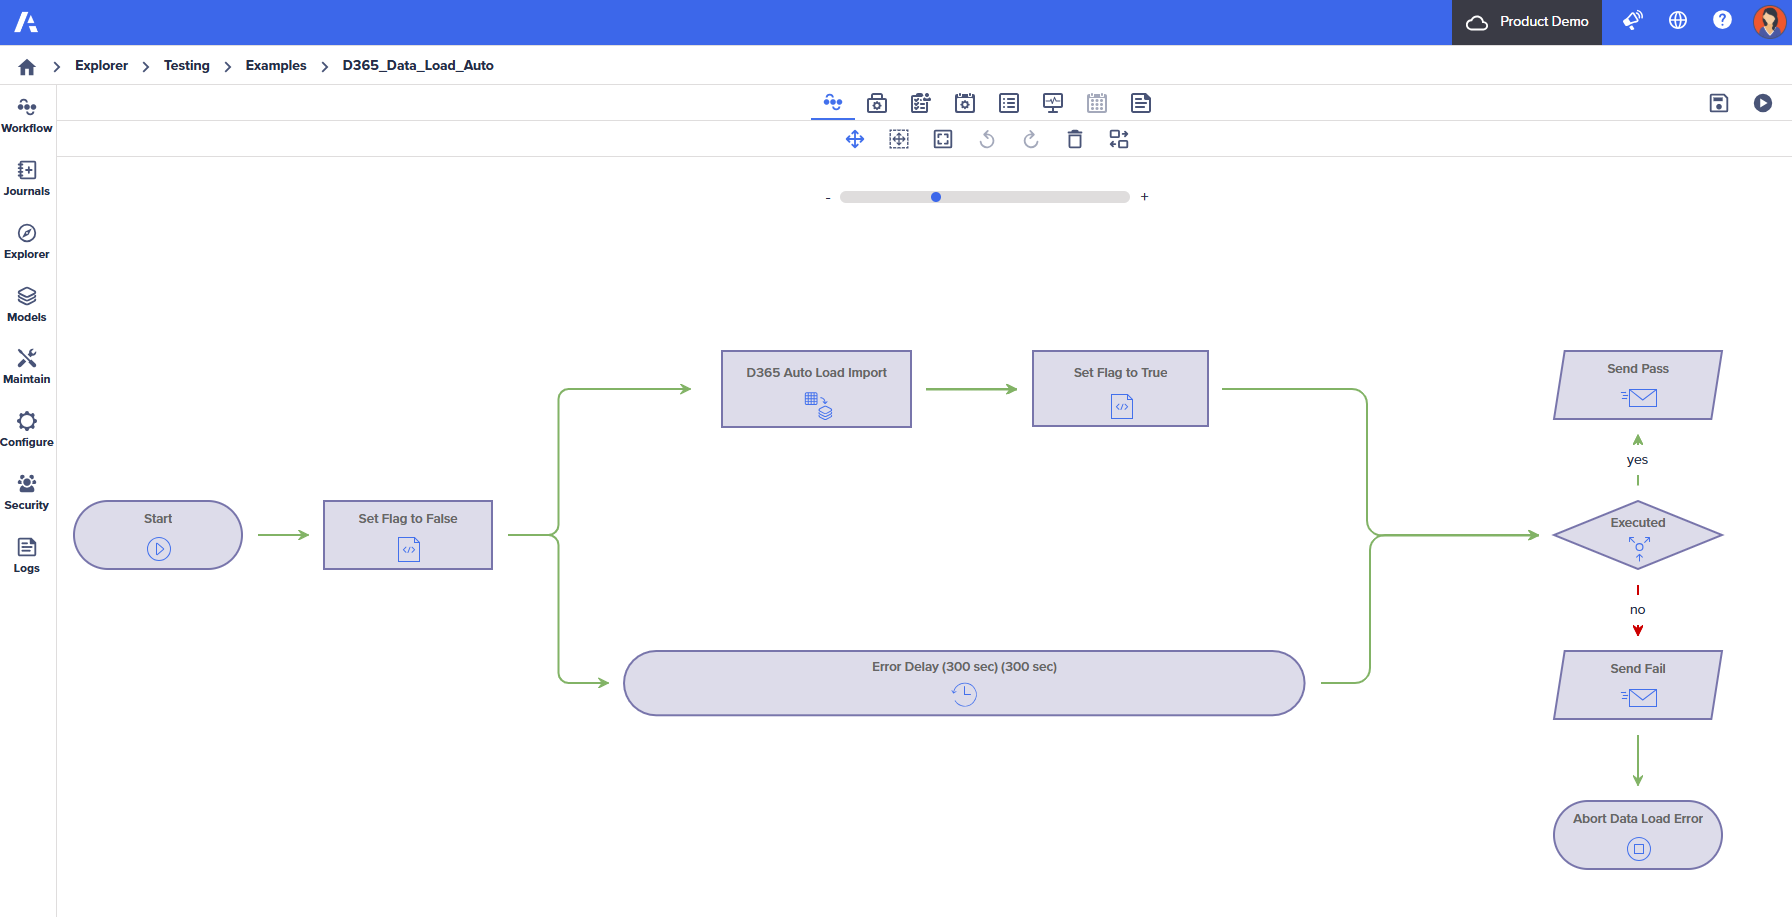
In this example, the Delay task is used in a path running simultaneously with a Data Transfer Task. If the Data Transfer task takes more than 300 seconds, the workflow process is considered failed. A message is sent using a Send Message task so that an Administrator can look into why the Data Transfer took more time than expected to finish.
Configuration Pane parameters
The key parameters include:
| Parameter | Description |
| Name | Enter the name that appears on the task. |
| Time | Enter the amount of time to pause the workflow before the next task in the path is executed. |
| Timeout | Enter the time that the system will wait for the activity to complete. |
| Advance Rule | Specify how to advance to the task. The default is All predecessors have completed. |
Configure a Delay task
To configure a Delay task:
- Drag the Delay task onto the Workflow Editor canvas to add it.
Find the Delay task in the Workflow Controls section of the Workflow toolbox. - Select the Delay task and select the Edit icon to edit the parameters in the Task Configuration pane.
- Fill in the required parameters.
- Select OK to apply changes in the Task Configuration pane.
- Select Save to save the workflow.
- Select Play in the Workflow Editor toolbar to start the workflow.
The workflow process starts. - When the workflow process is executed, the workflow will pause for the specified period of time when it reaches the Delay task.

