In Series 4 of the Excel Add-in, configure the settings file to enable connections via a proxy server.
You should have an intermediate to advanced knowledge of XML to adjust the settings file.
If you are not familiar with XML, ask your Tenant Administrator to configure your proxy settings.
You must have administrator permissions to change the proxy settings.
When you install the add-in, a settings file is created in the following location:
- %localappdata%\Anaplan\ExcelAddIn\4.x\Settings.xml
To make changes to the proxy settings, open the settings file in Notepad.
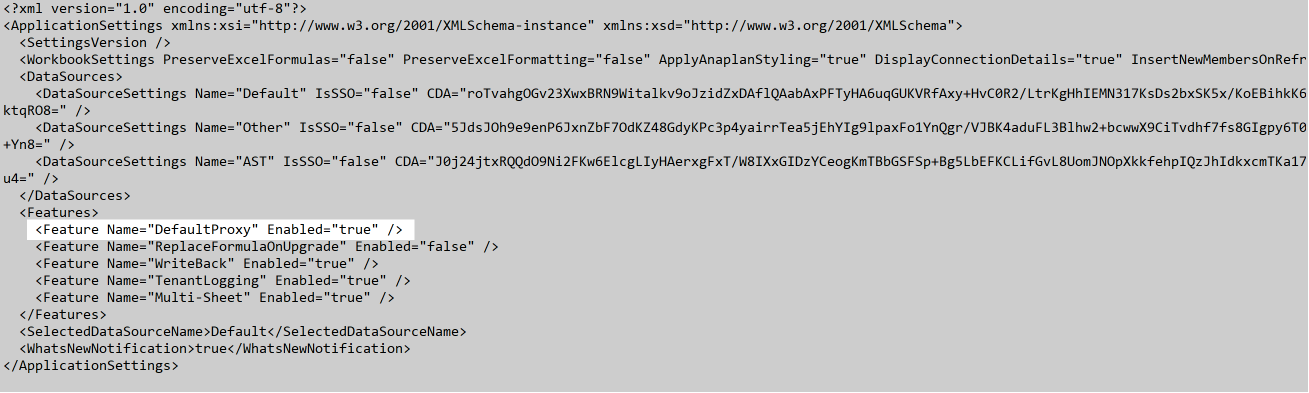
For any changes you make to the proxy settings to take effect, ensure that the DefaultProxy setting is set to true:
Add proxy settings to the settings file
When you install the add-in, there's no section in the settings file for proxy settings. Previous versions had a section for proxy settings by default.
To adjust the proxy settings in the settings file, use the text as a template. Insert the ProxySettings tags after the Features tags and before the close of ApplicationSettings tags.
<ProxySettings>
<SelectedProxy>Override</SelectedProxy> <!--Can be one of the following: None/Legacy/System/Override -->
<SelectedOverrideProxyName>SmoothWall</SelectedOverrideProxyName>
<OverrideProxies>
<ProxySetting Name="SmoothWall" Address="http://192.168.0.1" Port="800" />
</OverrideProxies>
</ProxySettings>
If you've added this text to the default settings file for the add-in, your file displays as below:
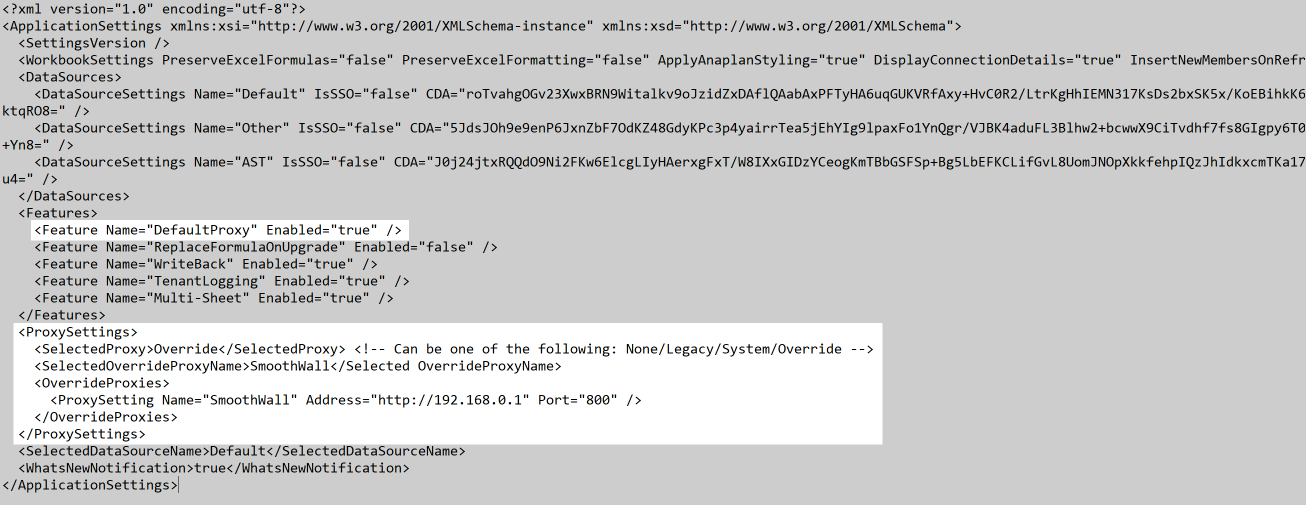
Be sure to use the <ProxySettings> tag.
Available proxy settings
Once you've added the text above to your settings file, you can replace the value between the SelectedProxy tags to select different proxy behaviors. The valid values for proxy settings are:
None
Use the None setting if you do not need to use a proxy.
This is the default behavior if proxy settings have not been configured in the settings file.
Legacy
Use the Legacy setting to enable the add-in to support your system's proxy server.
This setting attempts to connect you to your system's default URL for proxy servers. To change this URL, see Microsoft WebProxy.GetDefaultProxy Method . The add-in reads Microsoft Internet Explorer (IE) proxy settings.
System
Use the System setting as an alternative to the Legacy setting, to enable the add-in to support your system's proxy server.
This setting attempts to connect you to the non-default URL defined for proxy servers in your system. To change this URL, see Microsoft WebProxy.GetProxy(Uri) Method . The add-in reads Microsoft Internet Explorer (IE) proxy settings.
Override
Use the Override setting to enable the add-in to support a proxy server of your choice. This setting bypasses your system's proxy server and uses details you provide in the settings file.
To use the Override setting, you need to also provide additional values for the SelectedOverrideProxyName and OverrideProxies tags. An example can be seen in the prior section on this page.
Within OverrideProxies you must define one or more proxies. To define a proxy, you must provide a:
- ProxySetting Name, which you choose and should be logical.
- Address, which must be the http address of the proxy server.
- Port, which must be the port for the proxy server.

