

Use the Journal Entries Configuration screen to set up journal entries. Use the Journal Configuration tab to find and change the settings you need for your company.
Only users who have been granted the Journal Entries > Manage Settings authorization can configure Journal Entries (JE).
To configure the Journal Entries template:
- Select the Configure module to navigate to the Journal Entries Configuration screen.
- Select the Journal Configuration tab in the toolbar.
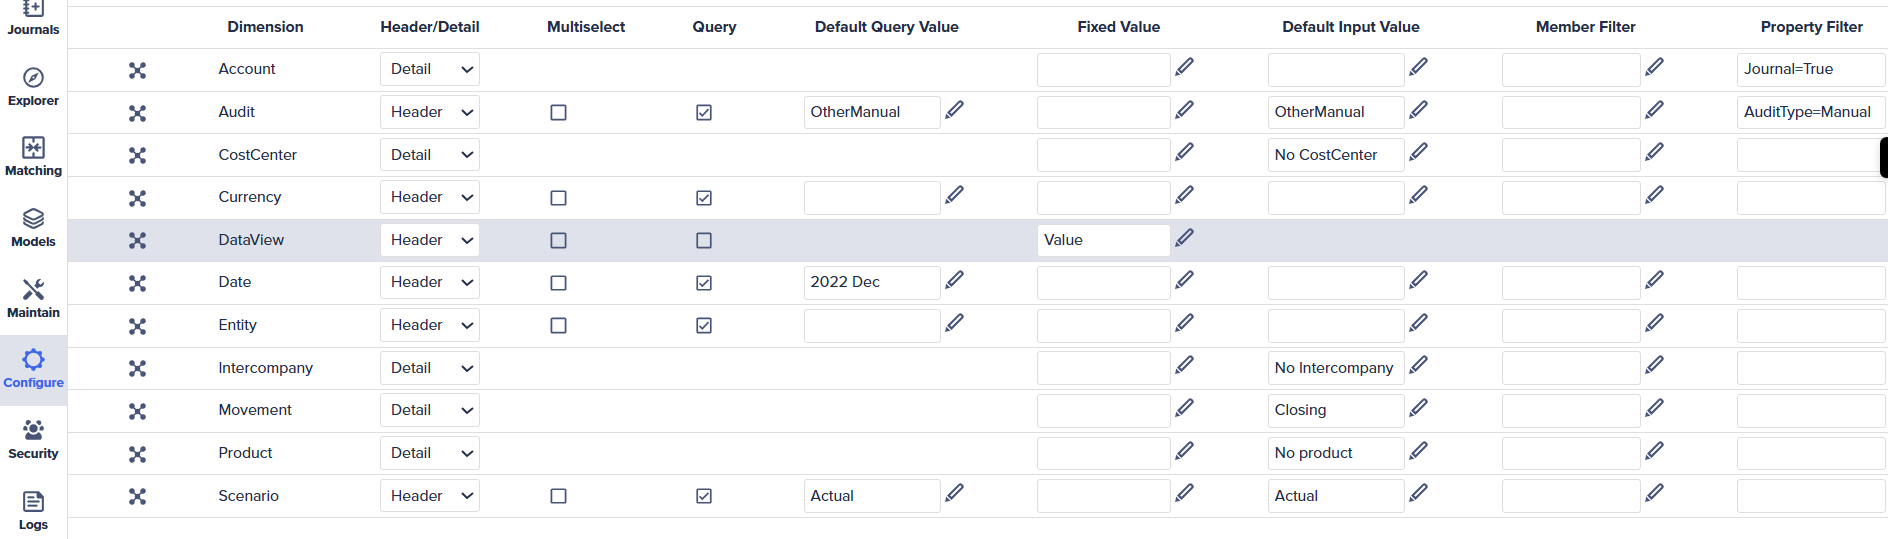
A list of Journal models appears. Most systems will only have one Journal Model for Consolidation. Journal Models can't contain spaces in their names. - Double-click the Journal Model to open the Journal Configuration Editor for the selected model.
- The Configuration Editor has pre-defined defaults. You can select to leave them as-is or modify them according to your company's needs.
- Use these as a guide to set the configuration settings for each dimension:
| Field | Description |
| Header/Detail | The list enables you to specify whether the dimension should appear in the Journal Headers or the Journal Details or not at all. Select from:
|
| Query | The checkbox indicates whether the dimension should be included in the Journals Query dialog. Only dimensions that appear in the Header can be added to the Query dialog. The Query dialog only looks at the JE Headers.
|
| Default Query Value | It enables you to select a member, or Global Variable to pre-populate a selection in the Query dialog. Use the member selector to select a member from the selected dimension. Alternatively, you can use the Custom Value field to specify a Global Variable such as |
| Fixed Value | It enables you to set a constant that can't be changed. It can be set to a member or a global variable. Use the member selector to select a member from the selected dimension. Alternatively, you can use the Custom Value field to specify a Global Variable such as |
| Default Input Value | It enables you to select a member, or Global Variable to pre-populate a selection in the New Journal dialog. Use the member selector to select a member from the selected dimension. Alternatively, you can use the Custom Value field to specify a Global Variable such as |
| Member Filter | Use this filter to restrict a user to select a member from within a specific hierarchy. For example, in the Currency dimension, you may want to restrict users to only select from the |
| Property Filter | Use this filter to limit user selections to only members that meet the property criteria. For example, in the Account dimension, you may wish to restrict users to only select accounts where the Journal property equals True. Property values are case-sensitive. For example, these statements will resolve: Journal = True But these statements won't resolve: Journal = true Journal = TRUE |
Warning: Changing the Header/Detail/None configuration after journals have already been created causes a loss of journal data.
- Drag and drop dimensions to change the order in which dimensions appear in the Query and JE Header and JE Details dialogs.
- Select Save to save your settings.
Note: Ensure that you create and query a few test journal entries to verify that you have configured the journal entries correctly. Changing the Header/Detail/None configuration after journals have already been created will cause a loss of journal data.

