Edit an integration flow to revise the workspaces, integrations, or the order of its steps.
You must be an Integration administrator to have access.
To edit an integration flow:
- Select ... (the ellipsis) to the right of an integration flow.
- Select Edit from the dropdown.
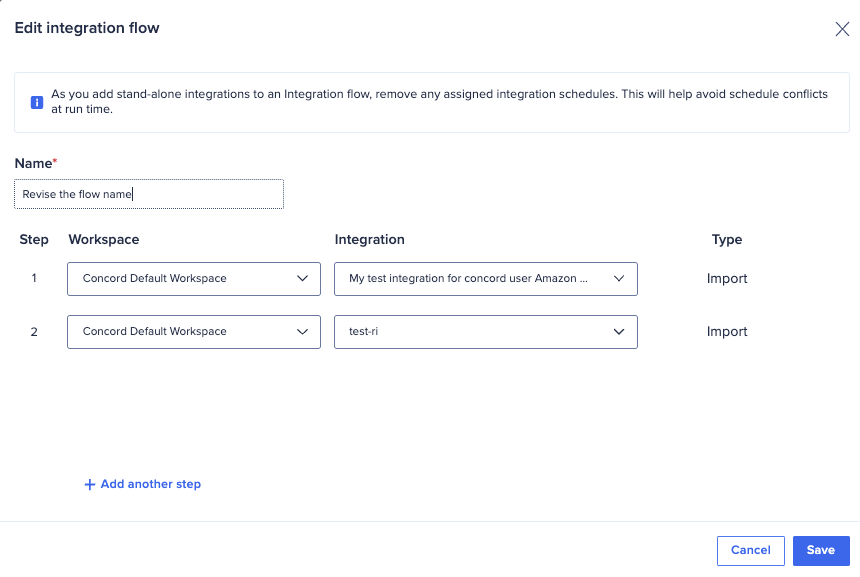
- Edit the integration flow.
You have many options to edit the flow. You can:- Revise the Name. Use a unique name that starts and ends with a letter or number. You can include spaces, hyphens (-), and underscores (_), but no other special characters.
The limit is 60 characters. - Choose another Workspace from the dropdown.
Once you set the workspace, the integrations in that workspace display in the Integration dropdown. - Choose another Integration from the dropdown.
The integration Type displays to the right. This edits Step 1.
- Revise the Name. Use a unique name that starts and ends with a letter or number. You can include spaces, hyphens (-), and underscores (_), but no other special characters.
- Select + Add another step
You need at least two integrations in a flow. - Select from the Workspace and Integration dropdowns again to edit Step 2.
- If you want to edit more steps, repeat steps 3 and 4 (above).
You can have to 10 steps in your flow. - To change the order of the steps, select the blank area outside the dropdown.
You can move the step into any position amidst the flow steps. - Select Save to accept and store the revised integration flow.
As an integration flow runs, the “Edit flow” option is deactivated. Wait until the run is finished. Then you can make changes.

