Send-back loops enable approvers to send things back to a previous step in the process so work can be re-done and re-submitted for approval, instead of rejecting outright and ending the workflow.
Note: Workflow Advanced is an entitled service and requires a separate subscription to enable the feature. Your Account Executive can assist you with this. The features are tenant-specific, so in a multi-tenant environment, the Workflow Advanced features only display on tenants that have the feature enabled.
To create a workflow with a send-back loop:
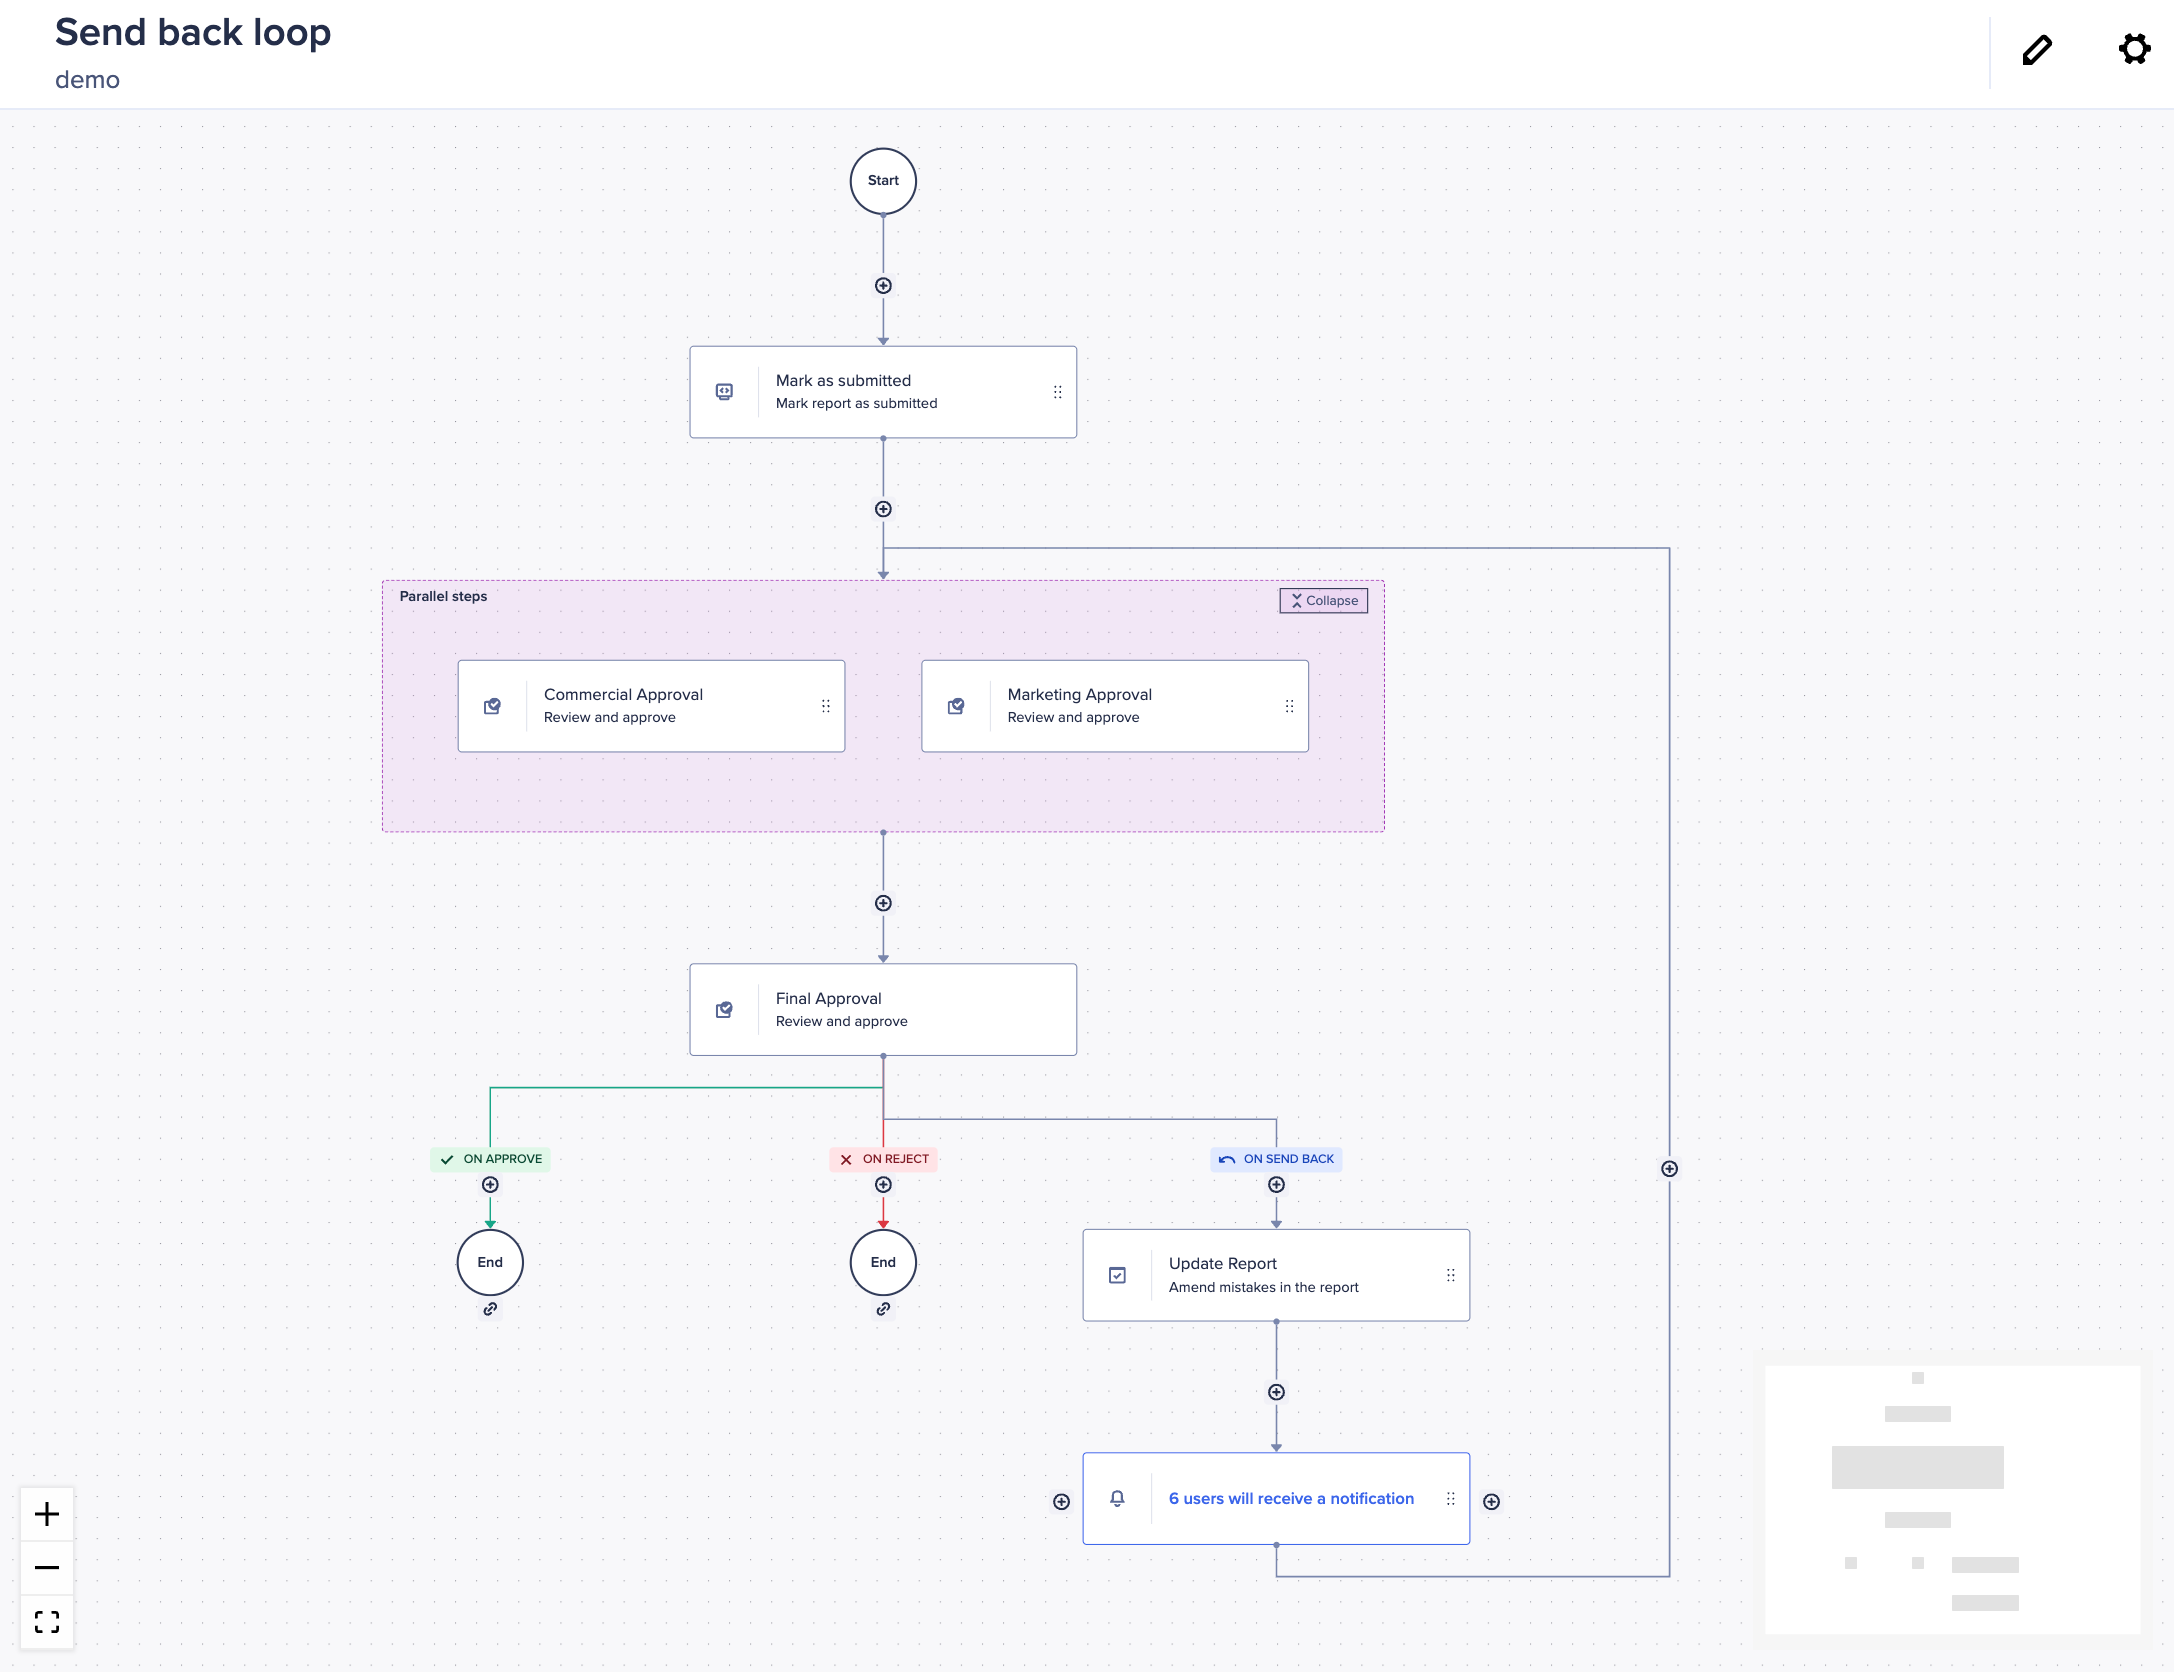
- Open a new or existing workflow template. Following the example above, we'll build a workflow where once a report is submitted, it must go through a few approval steps. We'll also give the final approver the ability to not only approve or reject the report, but send it back.
- In our workflow, we might have a machine task to mark our report as submitted. We'll then add two parallel decision tasks as the next step in our workflow for two different departments to approve the report.
Switch off the Enable branching toggle to enable parallel decision tasks. - Below the parallel block, add another decision task for final approval. This automatically splits your workflow into two branches, ON APPROVE and ON REJECT.
- Switch on the Enable send back for approver toggle.
- Select a step from the Send back to dropdown. An additional branchis created from the decision step that will send the workflow back to the step you selected.
Now, when your workflow runs, the approver in the final decision step can send the report back if they are unhappy with it, instead of rejecting it. - You can add steps to the SEND BACK branch, such as a page task to assign a user to update the report, or a notification step to inform all parties involved that the report has been sent back.
- You can add a due date in the Due section on the right panel.
- Once you are happy with your template and are ready to start using it, select Publish.

