Workflow Advanced enables you to create parallel steps in a workflow.
Parallel can be used to send approval tasks to multiple users at the same time, where each stakeholder requires a distinctive experience, for example reviewing a different page, or requiring different instructions/guidance information.
Note: Workflow Advanced is an entitled service and requires a separate subscription to enable the feature. Your Account Executive can assist you with this. The features are tenant-specific, so in a multi-tenant environment, the Workflow Advanced features only display on tenants that have the feature enabled.
To create a workflow with parallel steps:
- Add a task to a new or existing workflow template. In this example, we'll use a decision task to create a workflow where we want approval from several different departments at the same time. Enter a Task title and Instructions for the task assignee.
Note: Adding a decision task automatically creates branching. Branching isn't compatible with parallel steps.
- From the Select page section, you can use the search function to find a page and select it.
- In the Approver section, select one or more approvers for your decision task.
- Switch off the Enable branching toggle.
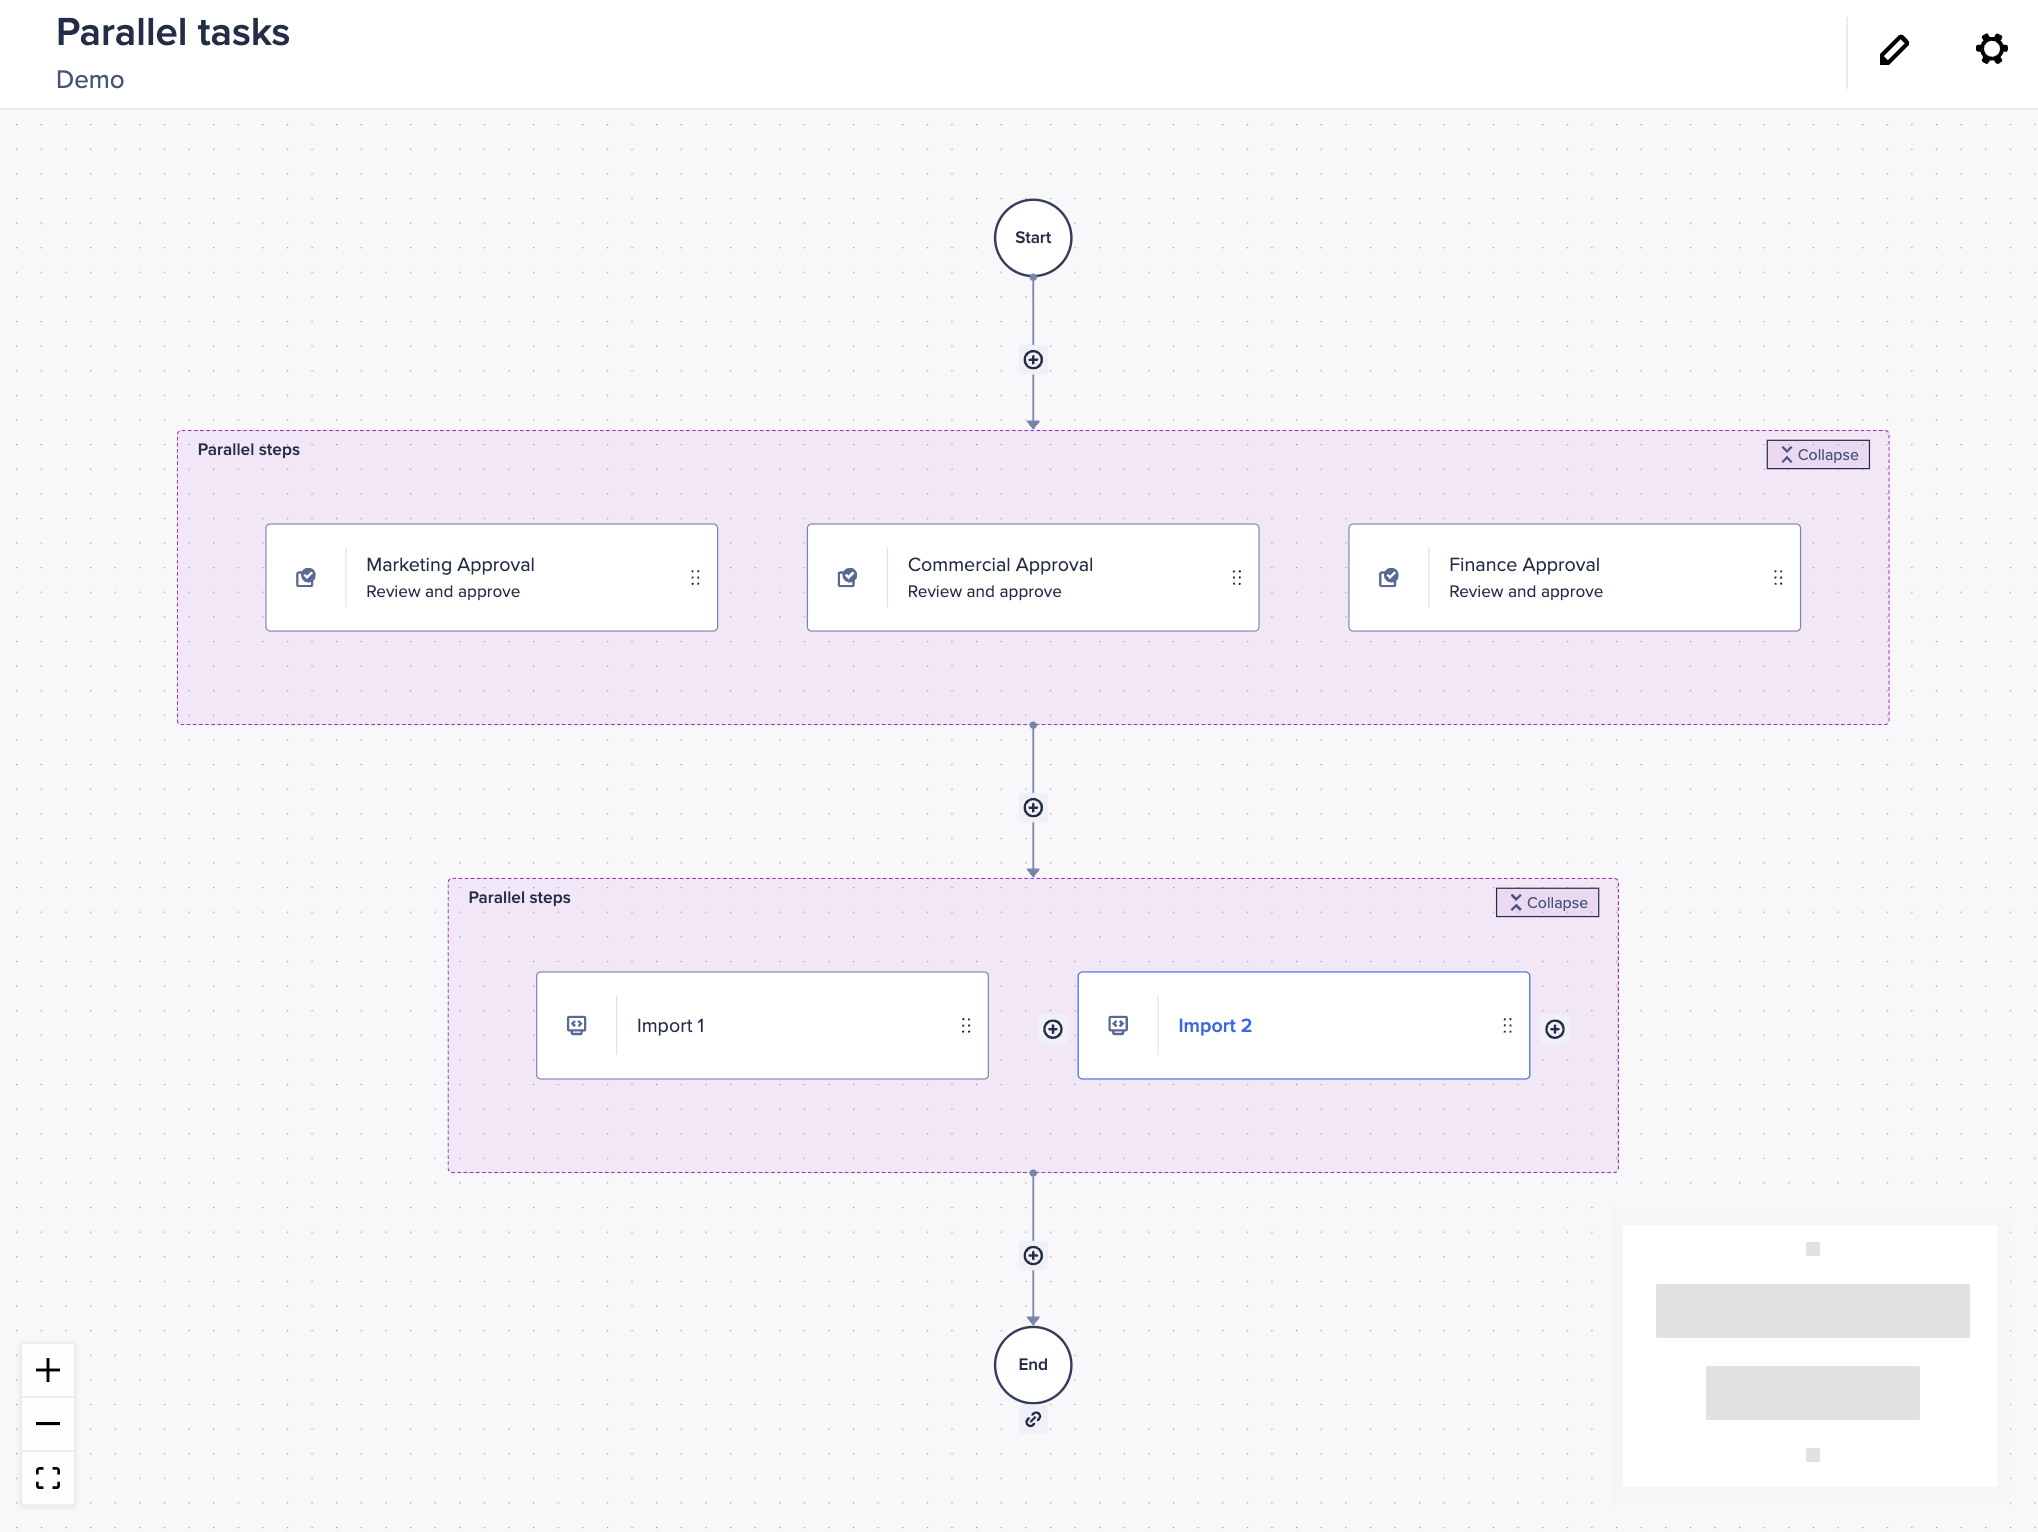
- You can now see on either side of your decision task. Select it to add a new task in parallel with the one you created.
This block that includes one or more parallel steps in your workflow is highlighted in pink. - Add another decision task from the right panel. You can configure it in the same way.
You can add up to 20 parallel tasks in one block. - You can add as many blocks of parallel steps as you need in a workflow. For example, once your approvals are complete, you may want to distribute the approved data into two different models or modules at once. You can do this by creating parallel machine tasks.
- Select the below the parallel block to add a new step.
- Select a Machine task from the right panel and enter a Task title and Instructions.
- In the Select action section, select in order:
- An Action type: These are standard model actions, such as import, export, and data write.
- A Workspace: The workspace that contains the model and its actions.
- A Model: The model where the actions exist.
- A Process: The name of the business process in the model.
- Add another Machine task from the right panel. You can configure it in the same way.
- You can add a due date in the Due section on the right panel.
- Once you are happy with your template and are ready to start using it, select Publish.

