Create a forecast action to generate predictions based on your forecast model.
To create a forecast action:
- In Forecaster, select Forecast actions.
- Select New forecast action in the upper right of the screen.
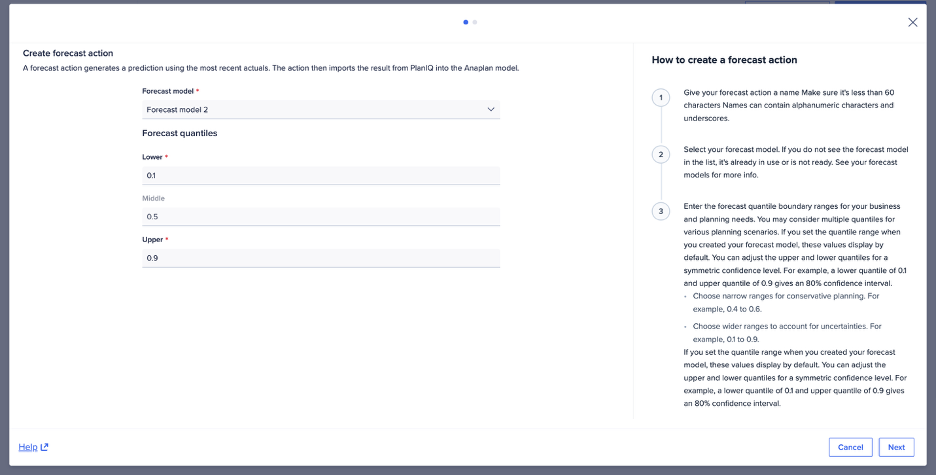
- Select a Forecast model from the dropdown.
The action uses this model to generate the forecasts. - Beneath Forecast quantiles, change the values of the lower and upper Forecast quantiles (optional). The values can be up to two decimal places (hundredths place). See Quantiles for details.
- Enter a value between 0.01 and 0.49 in the Lower quantile field. The default value is 0.1.
- Enter a value between 0.51 and 0.99 in the Upper quantile field. The default value is 0.9.
Example of a forecast action setup:
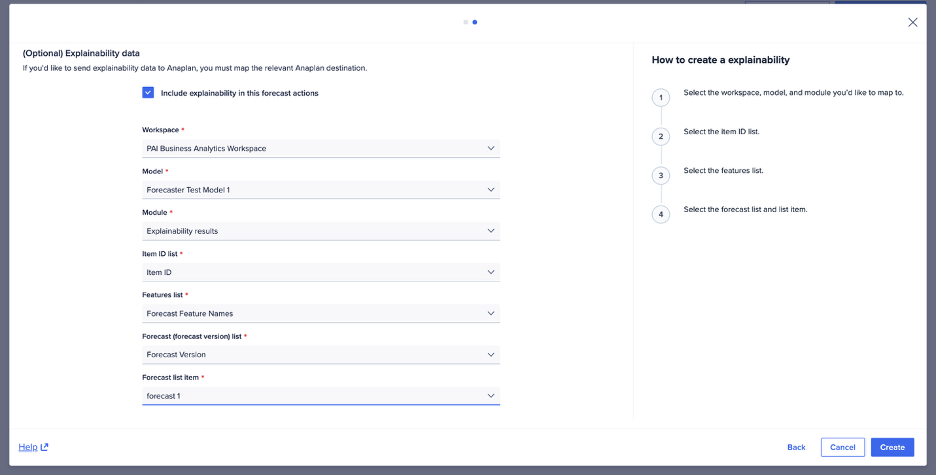
5. Select Next, and to import Explainability results to Anaplan, map these items:
- Workspace
- Model
- Module
- Item ID list
- Features list
- Forecast (forecast version) list
- Forecast list item
6. Select Create action.
Example of mapping for explainability results: