As a workspace administrator, when you set up an import, you must map the source data to the target data to ensure it imports correctly. The first stage is to map the columns in the source data.
Map columns in a list import
In a list import, you can map the source columns to the columns that display in the grid view for the list. These can be the list name, parent item, code, and any properties the list has.
On the Mapping tab, under Source, select the column headers from the dropdown menus to match the properties in the list you want to map them to.
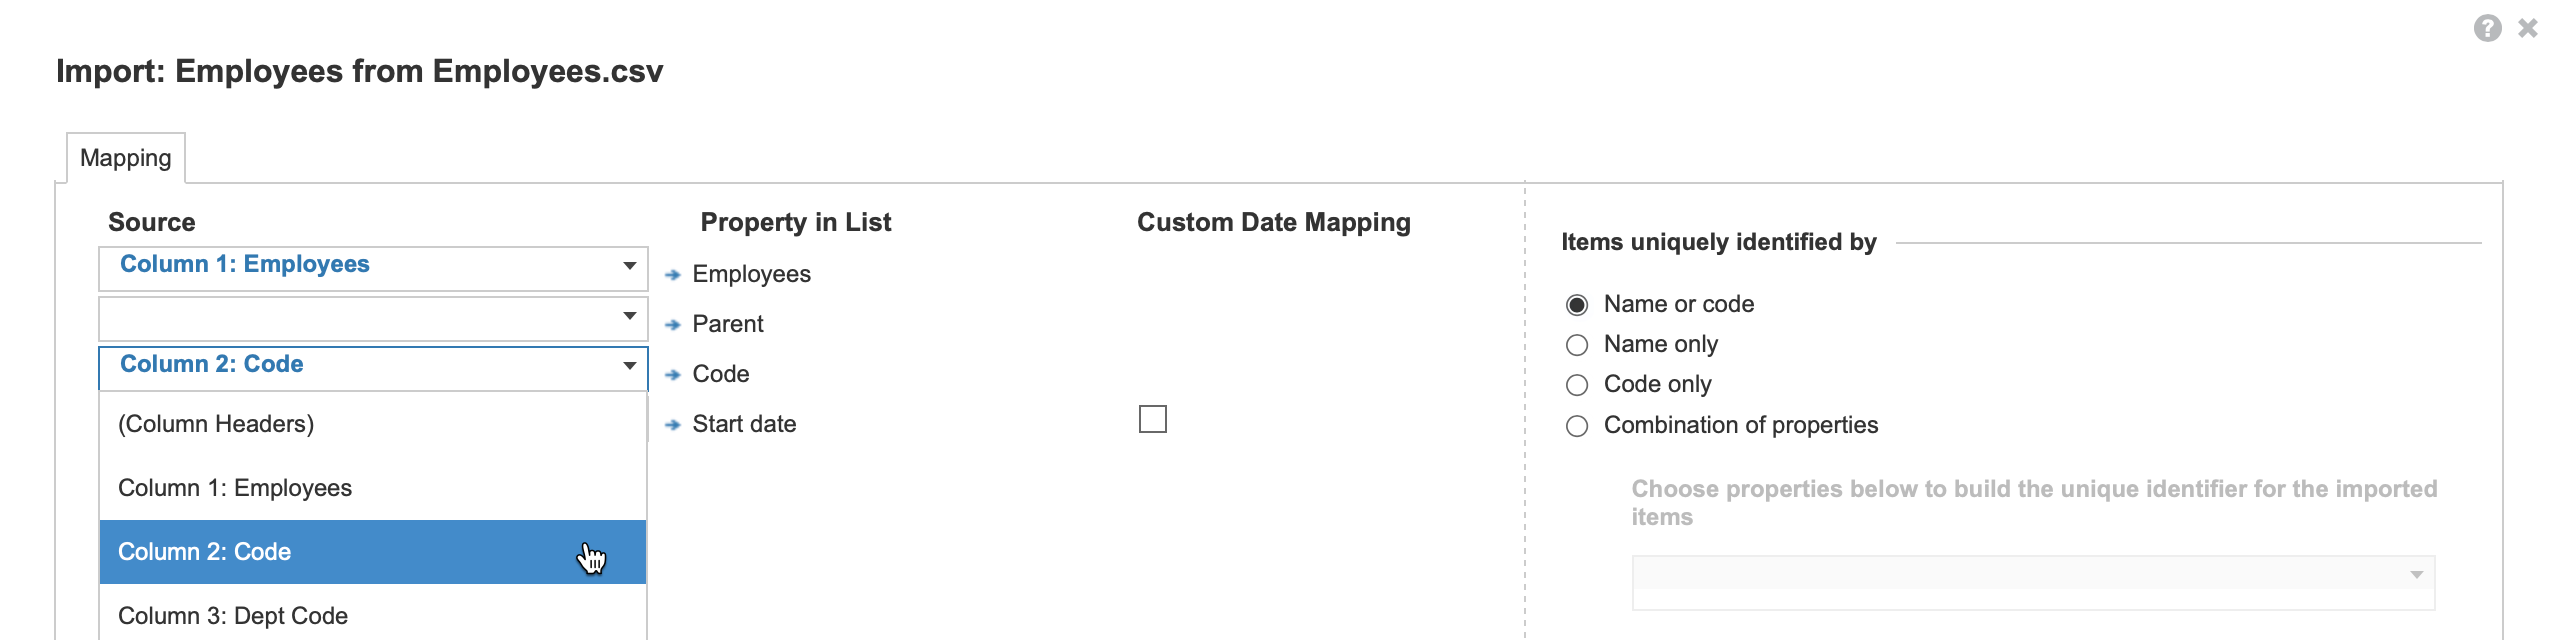
You can then configure how list items map. If the data includes a property with the Date format, you can map the timescale for the list import.
Map columns in a Users list import
When you import a list of users from a file, the target items are drawn from the grid in the Users pane.
A column for email addresses must be mapped to Email Address as under Target Identifier. Optionally, under Target Data, you can map source data to the user attributes: First Name, Last Name, Model Role, Single Sign-on, and User ID.
Map columns in a versions import
You must map to the Version column when you import to the Versions pane. You can optionally map source columns to target columns in the Versions grid.
Map columns in a module import
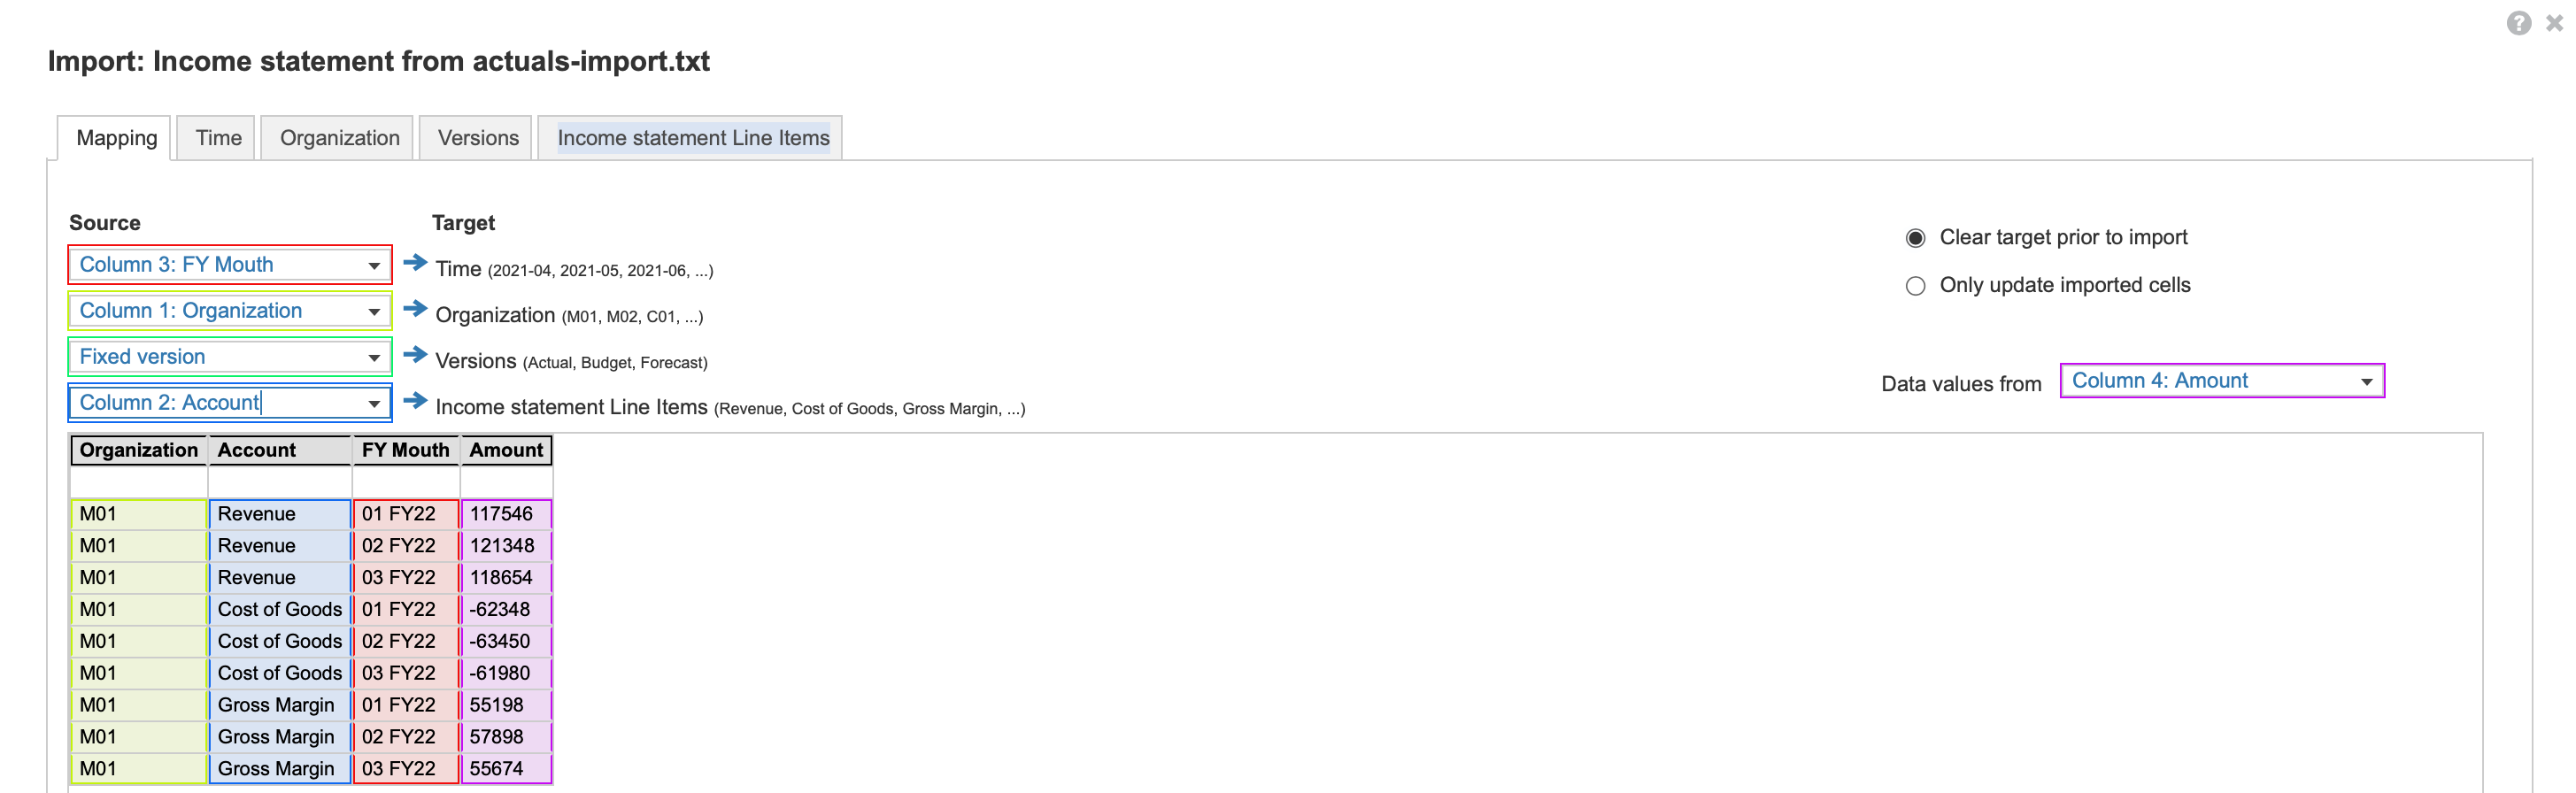
In a module import, map the column headers in the source file to the dimensions the module uses. This can include the lists that apply to the target module, Time, Versions, and the module line items.
On the Mapping tab, under Source, select the column headers from the dropdown menus to match the dimensions in the module.
You can map:
- Columns and dimensions one-to-one.
- One column to a fixed item (such as a line item or version).
- Multiple column headers to multiple line items.
You can also select Ask each time the import is run from the Source dropdown. Any future users who run the import receive a prompt to select an item to map to the target data.
Where the data value for a combination of several dimensions displays in a single column in the source, the import detects this and displays the Data values from dropdown on the right. You can use this dropdown to change the source column for data values too.
If you want to map many columns to a single dimension, you must import data first to an intermediary module that has many columns. You can then use the SUM function or parent hierarchies to aggregate the data to a single column in another grid within the model.
Once you map your columns, you can move on to map line items in your import. You can also map the timescale, if you've mapped source data to the Time dimension.
Map to a fixed item
If only one item from a dimension applies to the import, you can map to a fixed item. For example, you can map a column to the Actual version, if the file only contains data for that version.
To map to a fixed item, select Fixed version, Fixed line item, or Fixed time from the dropdown next to the relevant target. Go to the tab for the target dimension and select the specific item from the dropdown that applies to the data.
Map to multiple column headers
You can select the (Column Headers) option to map several column headers in the source to several column headers in the target. Use this option to map column headers to line items when line items each have a separate column for data.
You can then select the tab for each column to view or amend how item values map for each line item.

