Use DocuSign workflows to create a recipient list for your envelopes. This list is retrieved from the Anaplan module view you selected. It's also mapped to the recipients' roles you added to the DocuSign template.
You create a workflow in three steps. To begin:
- Select Workflows from the top-left.
- Select Create.
This opens the Step 1 Main Settings dialog. - Name your workflow in the field.
- Select the envelope to send.
- Select Next.
This opens the Step 2 Map Recipients dialog. From the drop-down lists: - Select the Anaplan module and view that contain the data to send to your recipients.
- If the relevant columns are not already populated, select them from the dropdowns.
- Select Next.
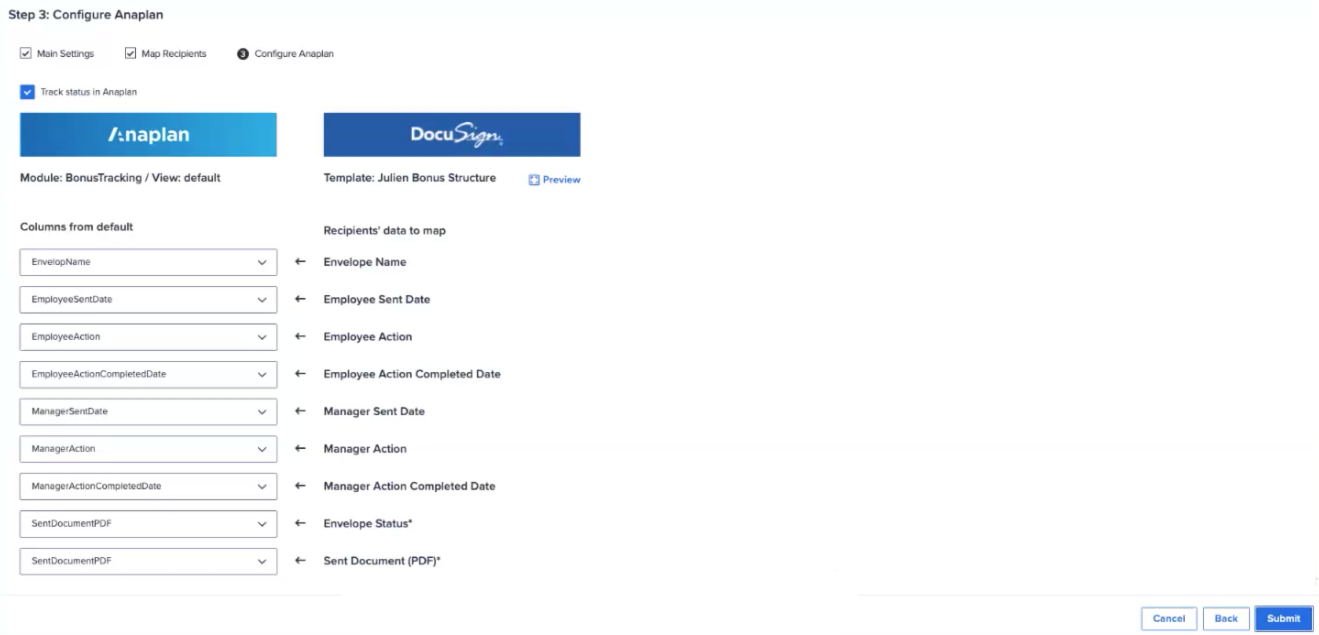
This opens the Step 3 Configure Anaplan dialog. - From the dropdowns, select the module columns if they are not populated.
At this point you can:- Select Preview to see the DocuSign template.
- Select Track status in Anaplan to be able to see progress in your model.
- Select Submit.
Your new envelope is created and displays on the list.
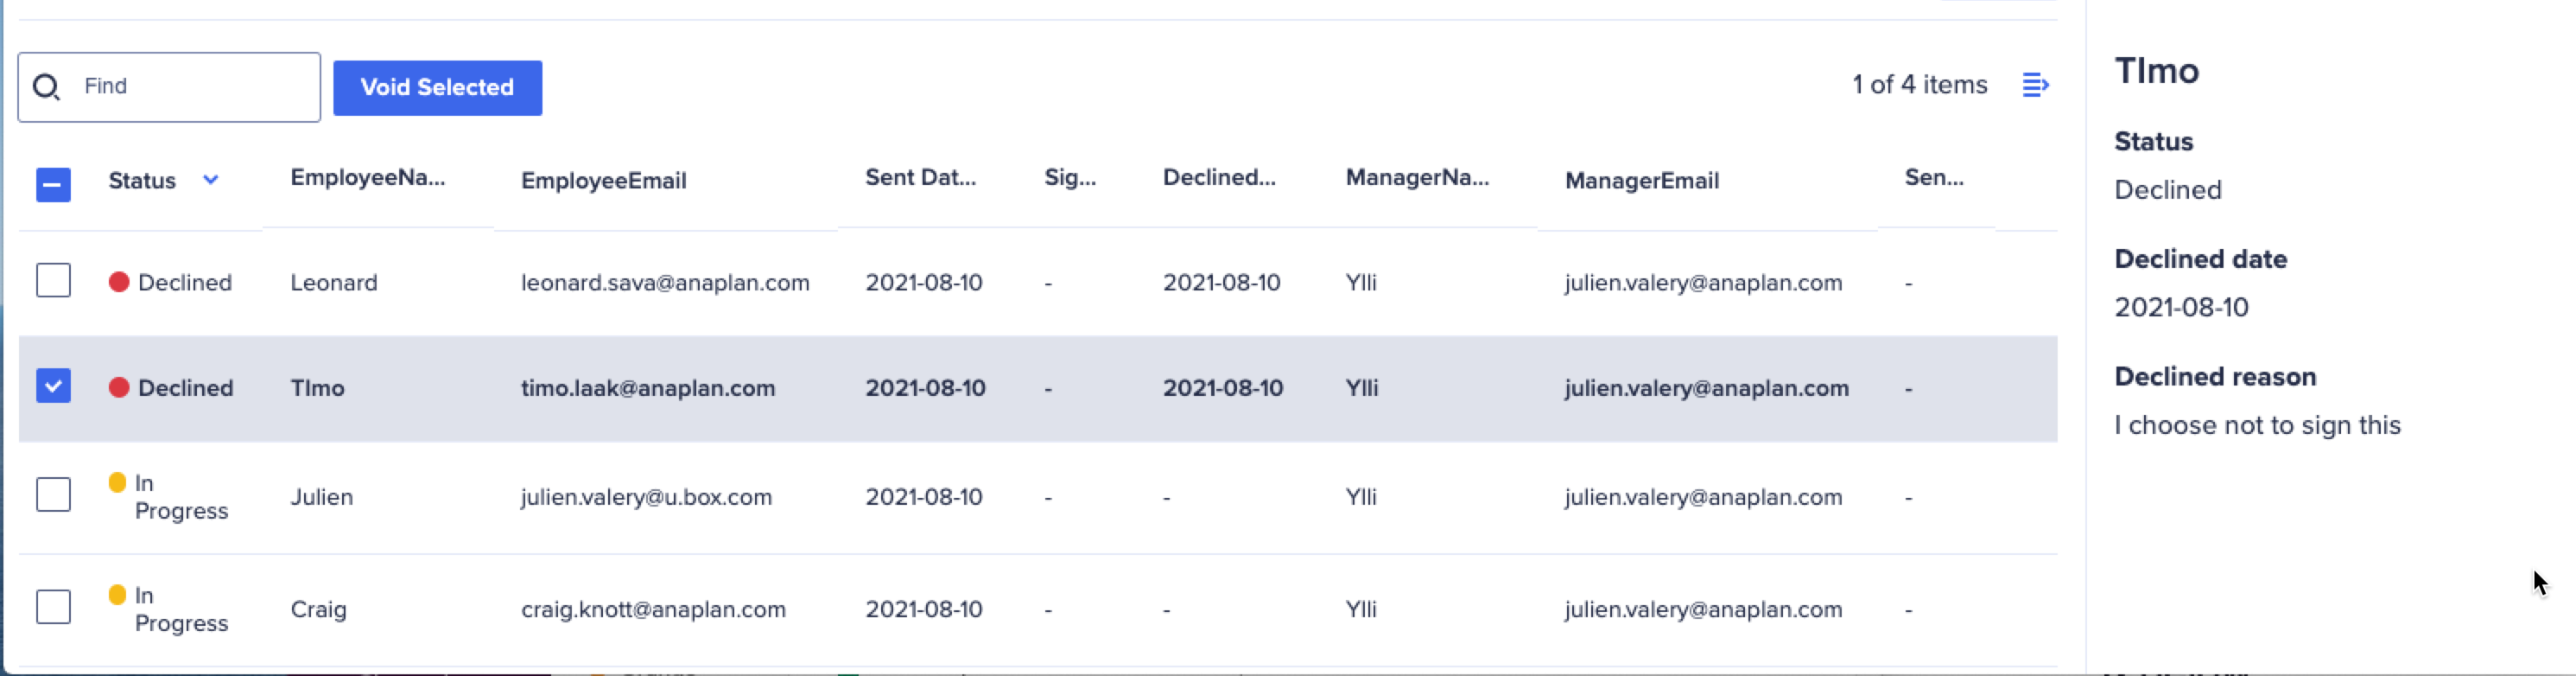
If you Track Status in Anaplan, you can see:
- which recipients declined, if any
- the date that they declined
Click a document in a work flow to select it. Then select the icon to inspect details, such as the decline reason.