Change the totals position when you design a view to help users easily find summaries or details.
You can only change the totals position on rows and columns. The dimension you change the totals position for must contain totals or other types of summary method.
You cannot change the totals position for a selected row or column if it:
- is a nested axis
- is an empty axis
- contains line items
- contains the Versions dimension
To change the totals position:
- In the Worksheet designer, click Select view.
The Select primary grid dialog displays. - Select Custom views.
A list of the modules in your model displays. - Select the module with the data to change the totals position on.
- Select a header value on the row or column to change the totals position on.
- Click the Totals position icon from the toolbar at the top right of the preview.
A drop-down menu displays.
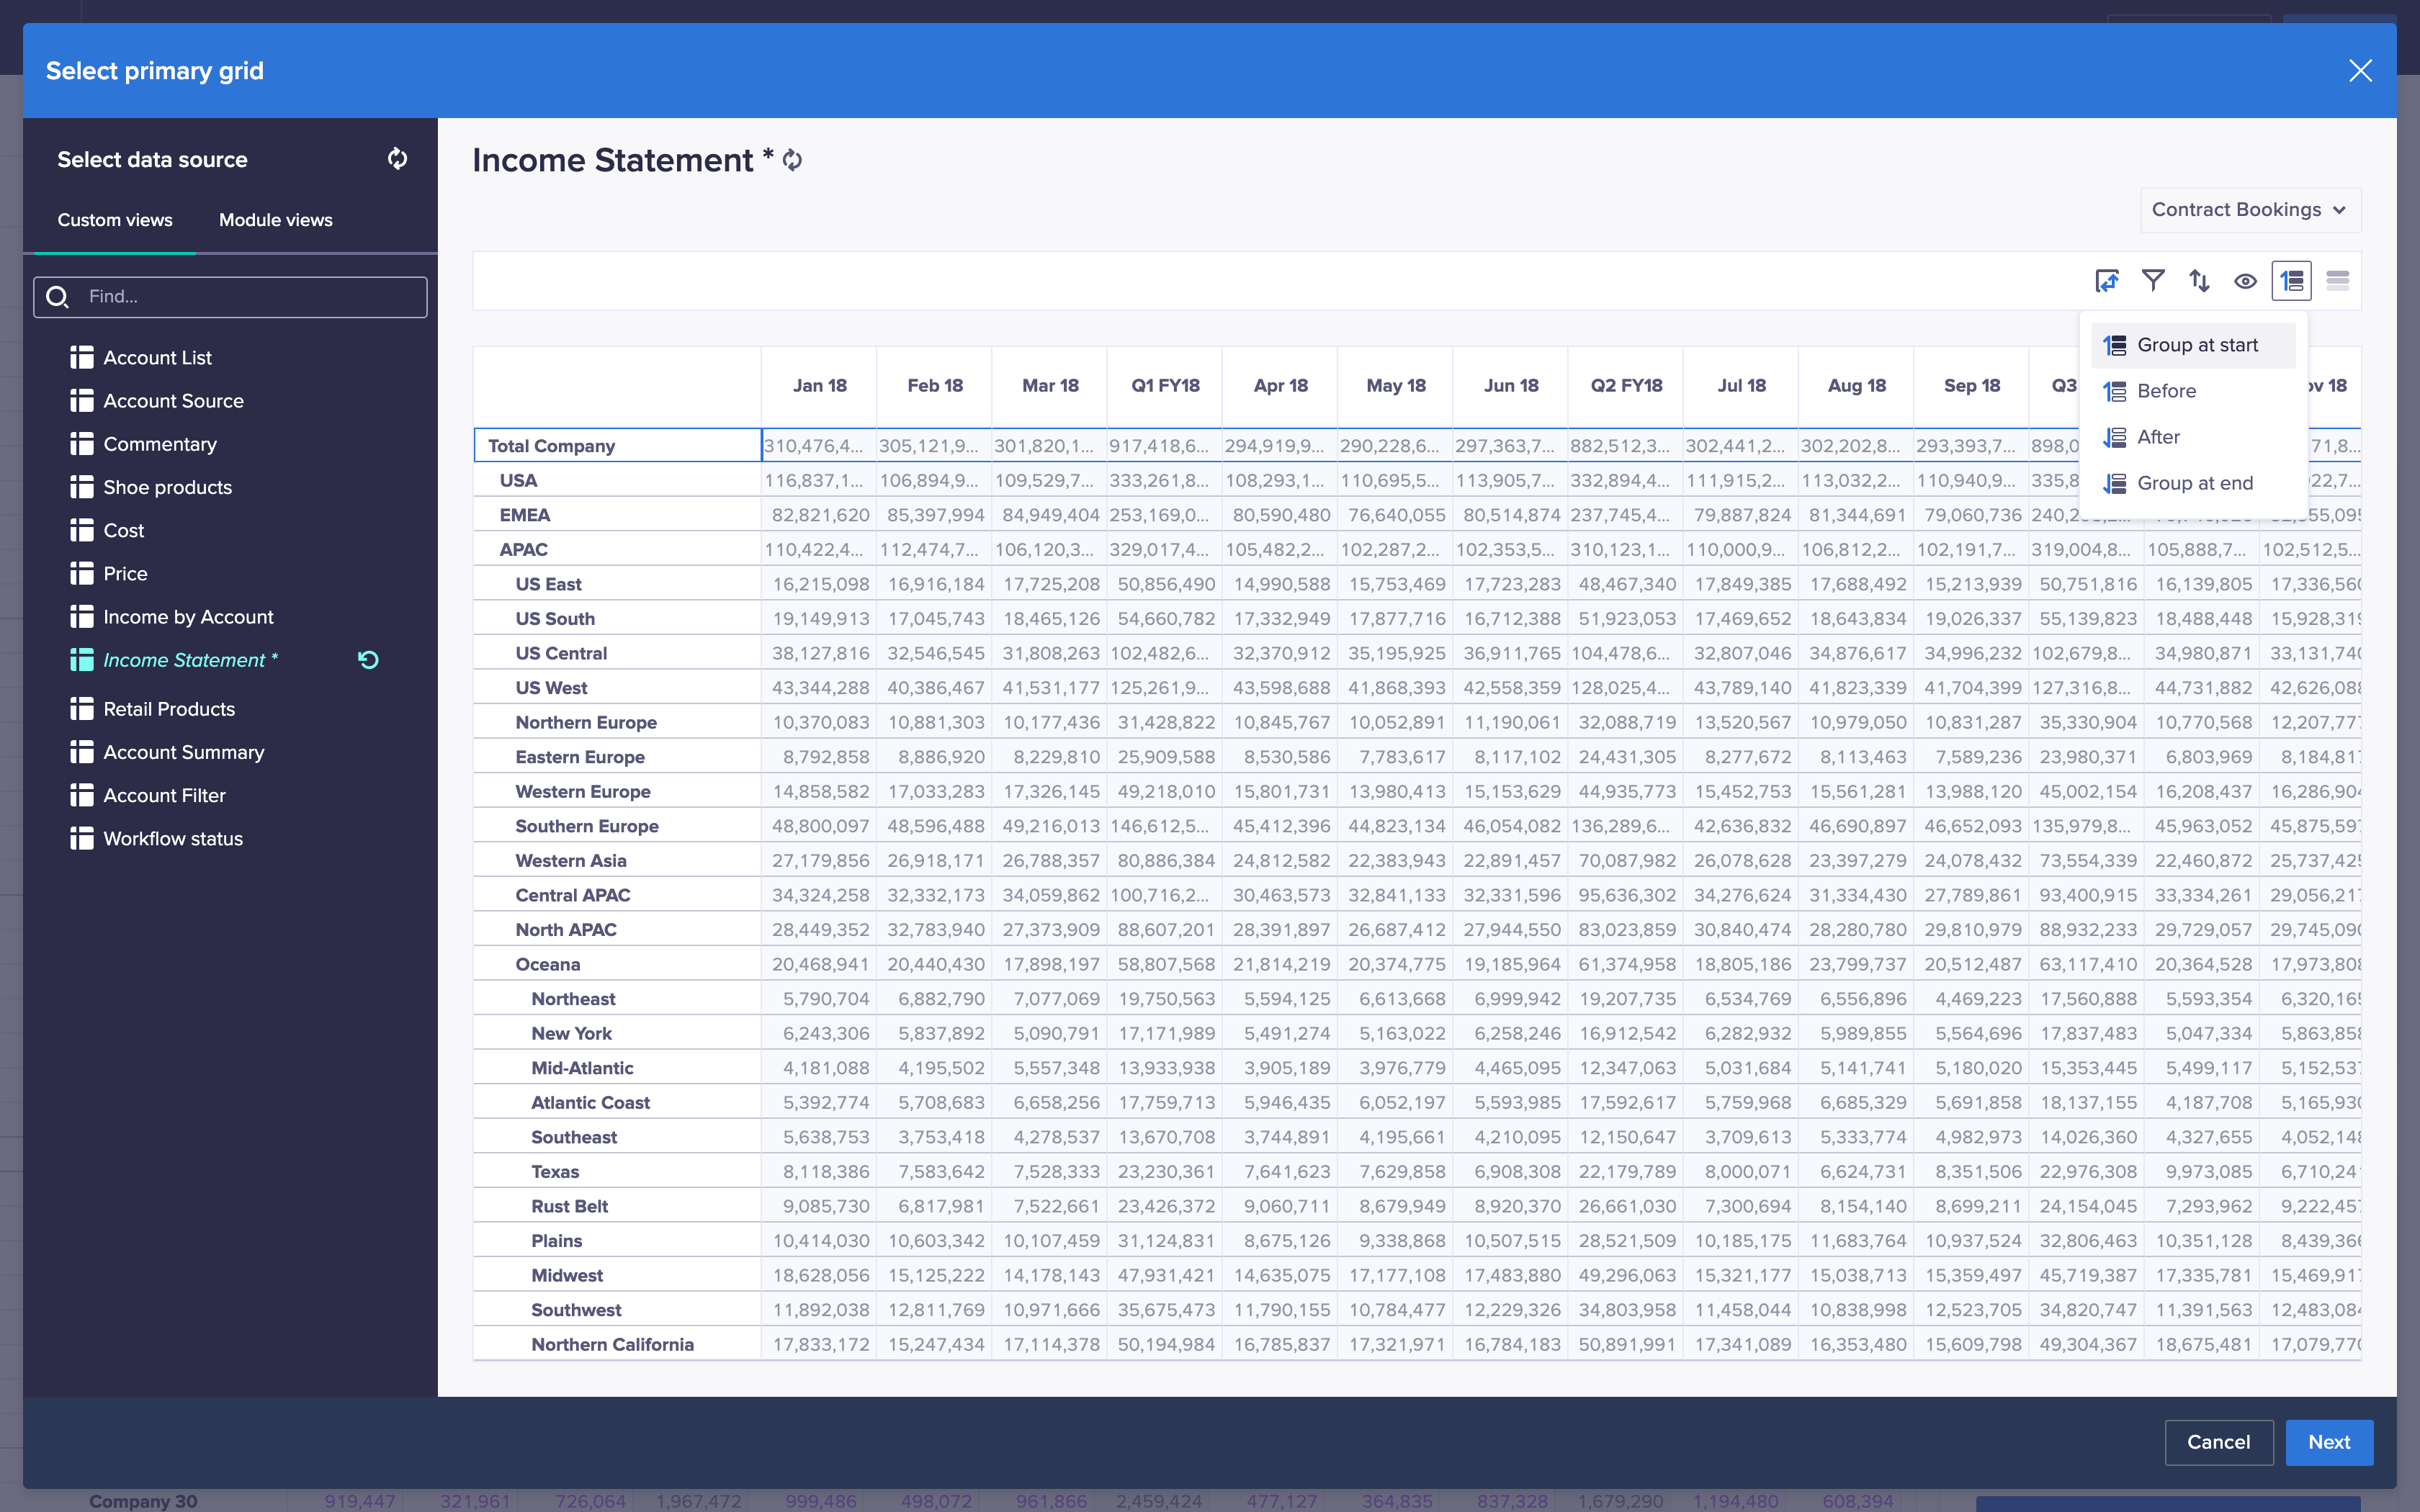
- Select a totals position. The available options are:
- Group at start, which positions all of your totals at the top of, or the left of, the selected axis
- Before, which positions your totals above, or to the left of, the summarized values
- After, which positions your totals below, or to the right of, the summarized values
- Group at end, which positions your totals at the bottom of, or the right of, the selected axis
- Click Next.
A screen displays with additional configuration options. These vary between worksheets and different card types. - Click Update.
The Worksheet designer displays. - Click Publish to save your selected totals position to the worksheet.

