
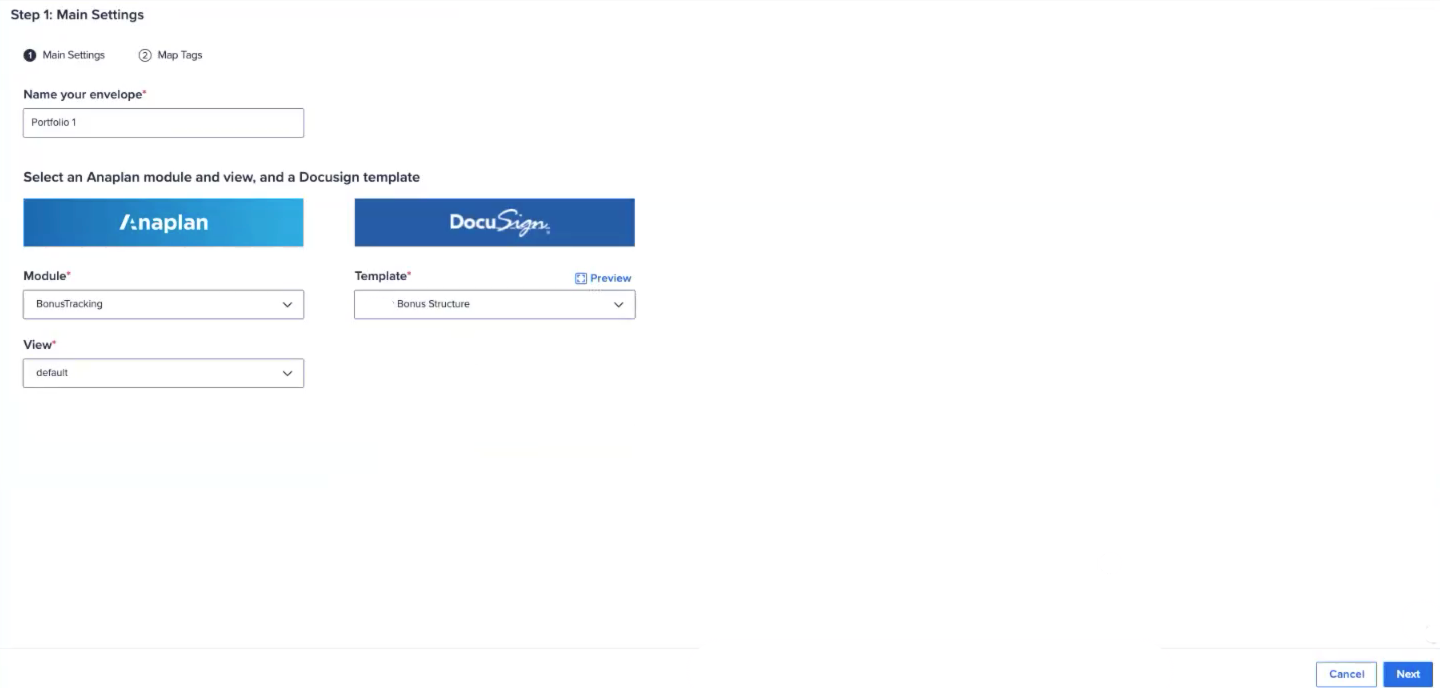
Create a DocuSign envelope to get data from the Anaplan module and saved view. At this stage, you also choose which DocuSign template to apply to your envelope.
Stage one is to create an envelope to set your data's module and view, and apply a DocuSign template. This stage is divided into two steps.
- Select DocuSign from the main Products dropdown in the top-left.
- Select Envelopes from the new dropdown in the top-left.
- Select Create.
- Enter a name in the Name your envelope field.
- From the dropdowns:
- Select an Anaplan Module
- Select a saved View
- Select the DocuSign Template to send. The template must contain at least one DocuSign tag per document.
- You can also select Preview to inspect the template.
- Select Next to save your envelope.
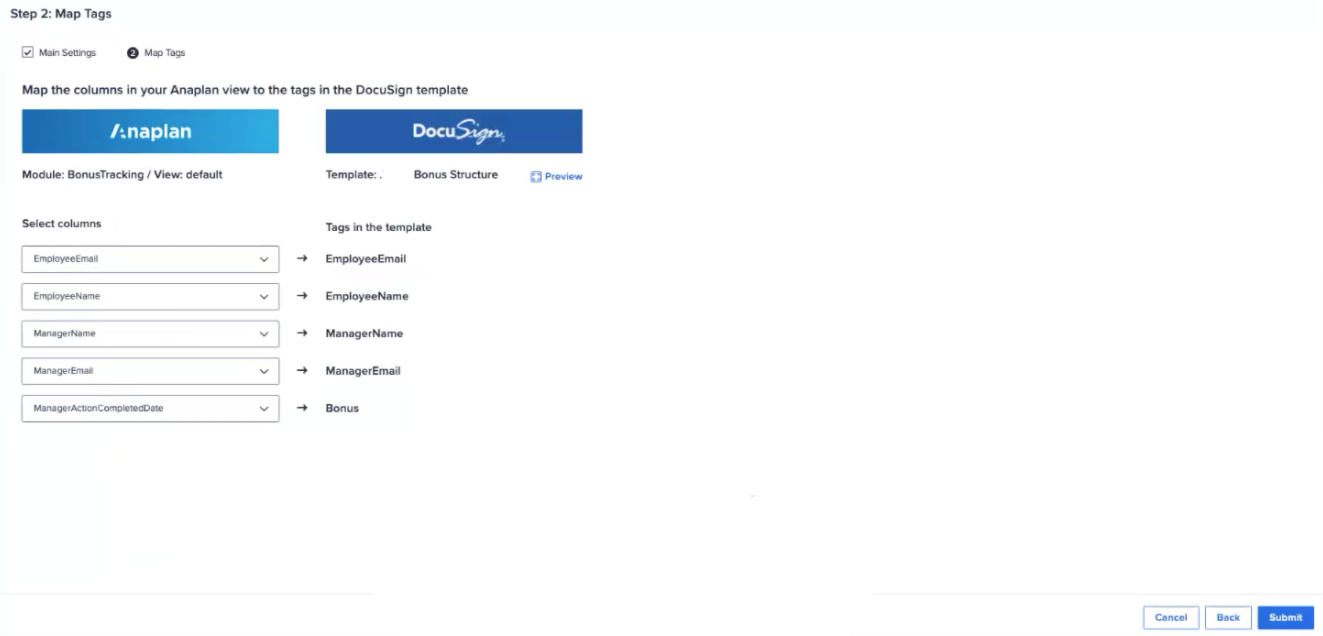
Map the Anaplan data to the DocuSign Tags in the template.
- The column headers display beneath the Anaplan logo, or use the dropdowns to select columns if they do not. In the DocuSign portion of the dialog, you get a reminder of the template name and the tags it contains.
- Select Submit.
The envelope is created and listed on the Envelopes page. You can now link the envelope to a DocuSign Workflow.
- The Anaplan DocuSign integration has been tested with 200 mappings.
- The list of columns will appear empty if your Anaplan saved view does not contain any data.
- Hidden columns in Anaplan do not display.
- You might want to add tags to the DocuSign template after you created an envelope. In this case, reopen the envelope and map the new tags to the relevant Anaplan column headers. If you miss this step, the documents are sent without any Anaplan data.

