You can pivot your dimensions (lists, line items, time, or versions) between rows and columns, or display them as page selectors to analyze your data. For example, to display the monthly breakdown of a product, move the Product dimension from pages to rows, with time on columns.
There are two types of data source:
- Module view: You create a module view in the source model; its dimensions are fixed and cannot be pivoted.
- Custom view: You can customize the grid directly with pivot, sort, filter, and show selections. Customizations are not preserved when you pivot a dimension to the page level.
You can only pivot custom views.
If the data source for a grid card is a custom view, then on the Grid tab you can toggle right on Users can pivot data so end users can pivot their own display of the grid card. If you create a new grid, the end-user pivot is enabled by default, whereas end-user pivot is not enabled by default for existing grids (from when the end-user pivot feature was released).
If you pivot a grid, to give an axis that contains a filtered line item and a nested dimension that was not part of the filter definition, then the filter is not preserved.
If you change the underlying view for a grid, then end-user pivots are reset.
You must open your page in designer mode. Select Edit .
Note: Filters and show selections are removed when you pivot the dimension to page level. To ensure your customizations apply when end users pivot the grid and move your chosen dimension to the page level, directly configure the page-level context selector.
To edit cards, select Edit to open your page in designer mode.
Select Save to save as a draft, or Publish to publish the page.
Select a custom view
To select a custom view for a grid card:
- Select Configure grid on a new card, or hover over your card and select Edit .
Read how to add a card to a board or worksheet. - On the Overview tab of the Card configuration panel, select Select a data source.
- On the Custom views tab of the Select data source panel, select the view you want to pivot.
Pivot your custom view
To pivot your custom view:
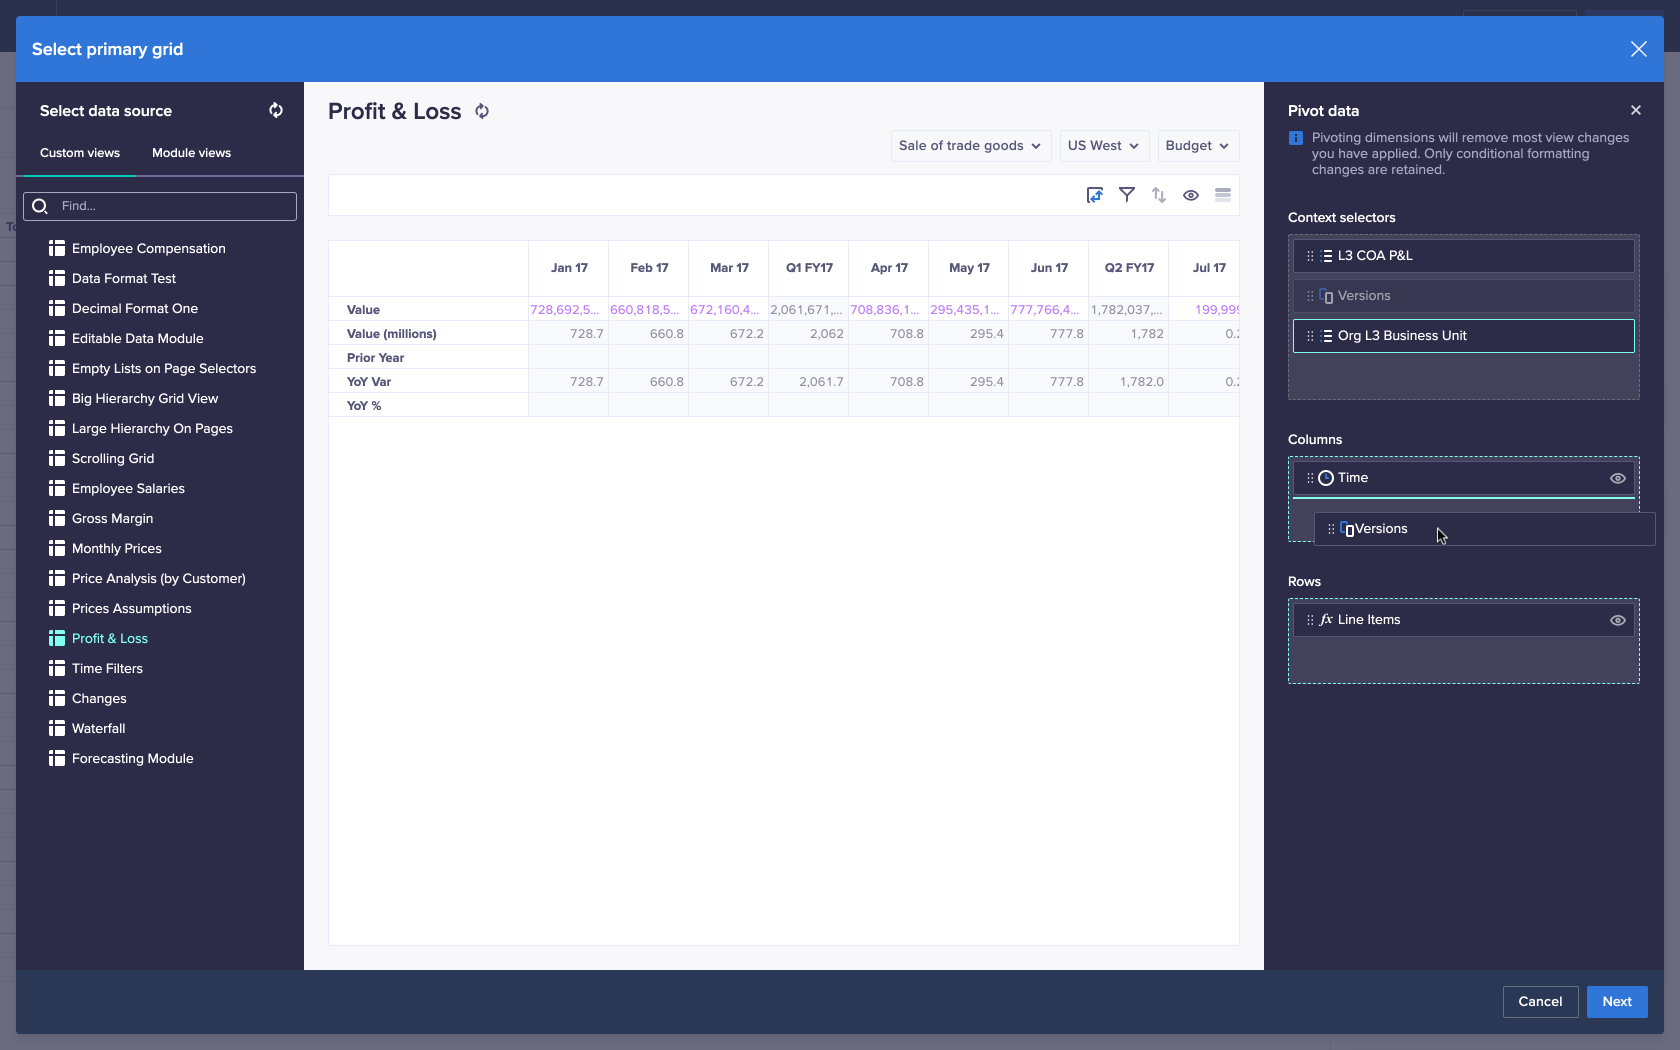
- Select Pivot at the top-right of the preview.
- On the Pivot data panel, drag and drop dimensions to the required Context selector, Column, or Row.
You can also swap two dimensions. Drag one dimension over another and drop it when the dimension outline changes color. - Select Update.
- Select Save to save your page as a draft, or select Publish.
When you publish your page, user customizations for the grid are reset.

Reset your view
To reset a card, select Pivot , then select Reset pivot on the Pivot data panel.

