A workspace administrator can set up a create action that, when run, adds a new item to a numbered list. You can also configure the action so it opens a different dashboard from the one that has the action button. This enables you to enter additional information for an item when you add it.
You can use the Create action to improve and simplify workflows. As a workspace administrator, when you set up the action, you can configure it so users can either:
- Create items without leaving the source dashboard
- Create items and launch a target dashboard in which to enter related data
You can only use Create to add new items to numbered lists, or numbered list subsets. The list or list subset must be assigned a parent in the list hierarchy. You cannot choose the Users list to be the numbered list or parent list.
Select parents for the items you create
When a workspace administrator sets up a create action, they can optionally configure it to prompt users to select a parent item or items. When you run the action, a dialog displays available parents to select. If you select more than one parent item, the action creates a different new item under each parent.
If you do not configure the action to prompt for parents, users can select a parent item on the source dashboard before they run the action.
In either case, if you run a create action without selecting a parent, the action creates the item under the first item in the parent list.
Restrict data on the target dashboard
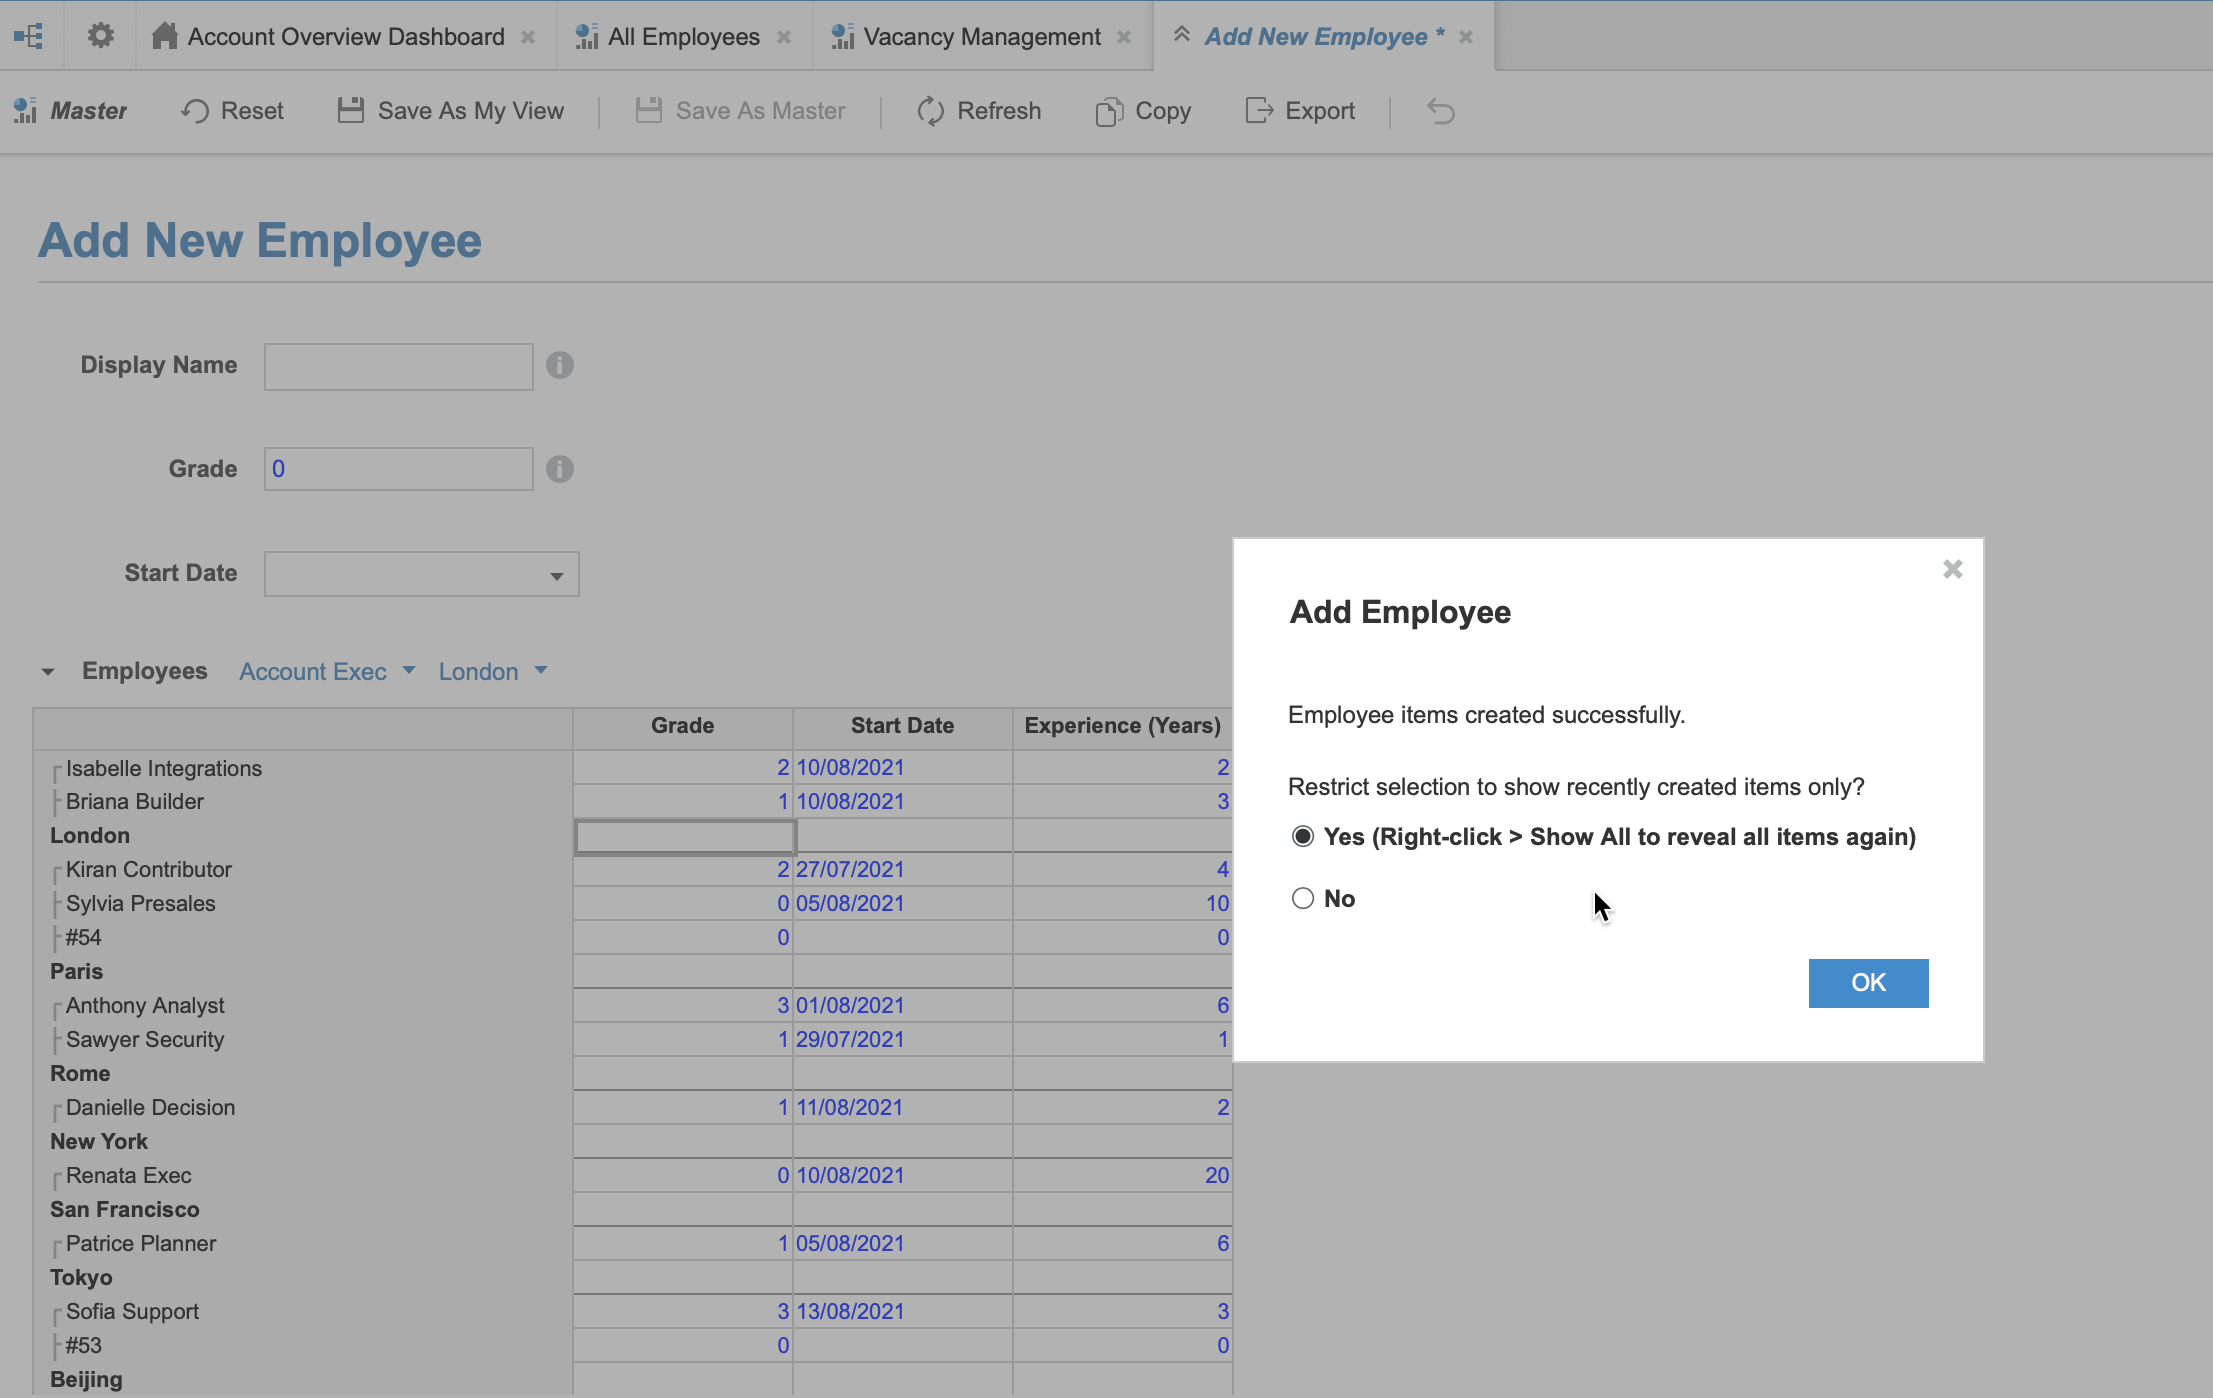
As a workspace administrator, you can configure a Create action so users can choose whether the target dashboard displays all data, or only data for recently created items. This enables users to focus on updating the items they just created when they ran the action.
To remove the restriction, the user can select Show All from the dashboard context menu after they run the action.
The option to prompt users to restrict data is only available if the numbered list is on the rows or columns of the dashboard grid.
Example: Add new vacancy from a dashboard
An HR administrator needs to add vacancies to departments so the business can advertise a new role. The HR administrator has limited access and needs to add items from a dashboard.
Create a numbered list with the name #Employee with a Department list as its parent. Add a display name property to #Employee, so that you can assign names to the employees when the vacancy is filled.
Add a Vacancies module that has #Employee on rows and line items for job details on columns, such as Grade, Job Title, and Salary. Publish Vacancies to a Vacancy Management dashboard.
Now set up a create action, Add Vacancy, and configure it to create items in #Employee. Leave the Default Dashboard to open field blank, as the HR administrator only needs to access the dashboard dedicated to their task.
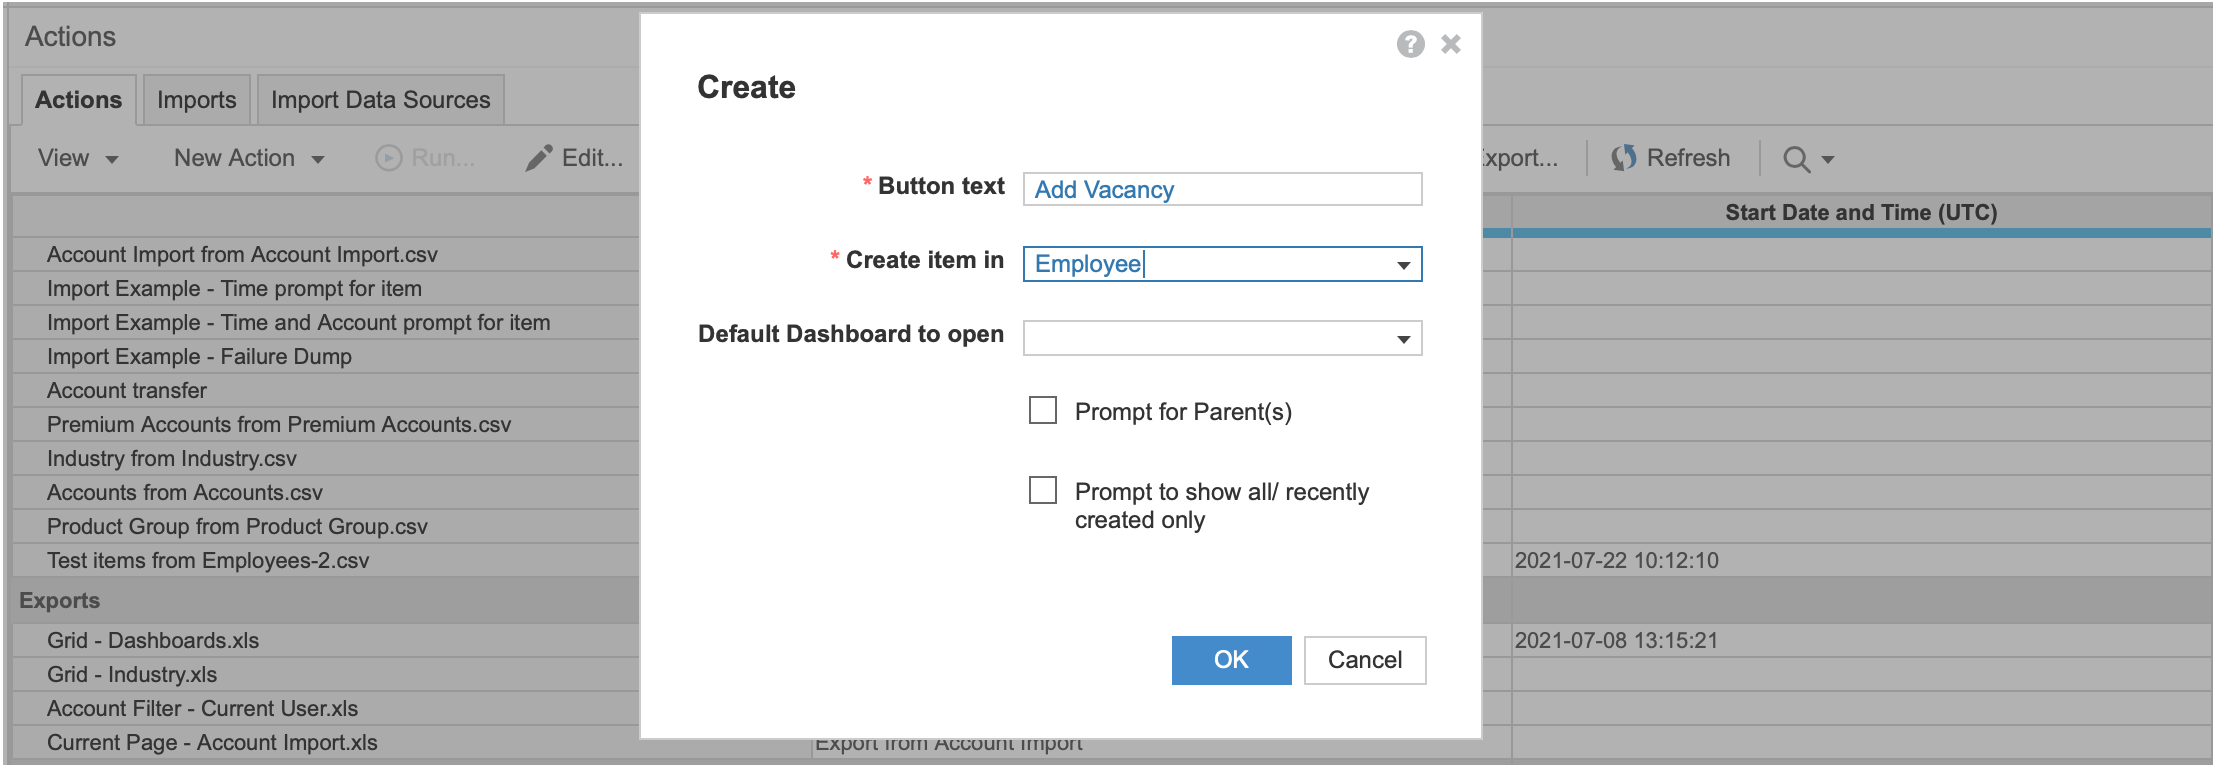
Publish Add Vacancy to Vacancy Management.
When the HR administrator selects the Add Vacancy button a new item is added to #Employee. If they want to determine the parent for the item, they can select a department in the Vacancies grid before they select the action button. The item is added as a child of the parent.
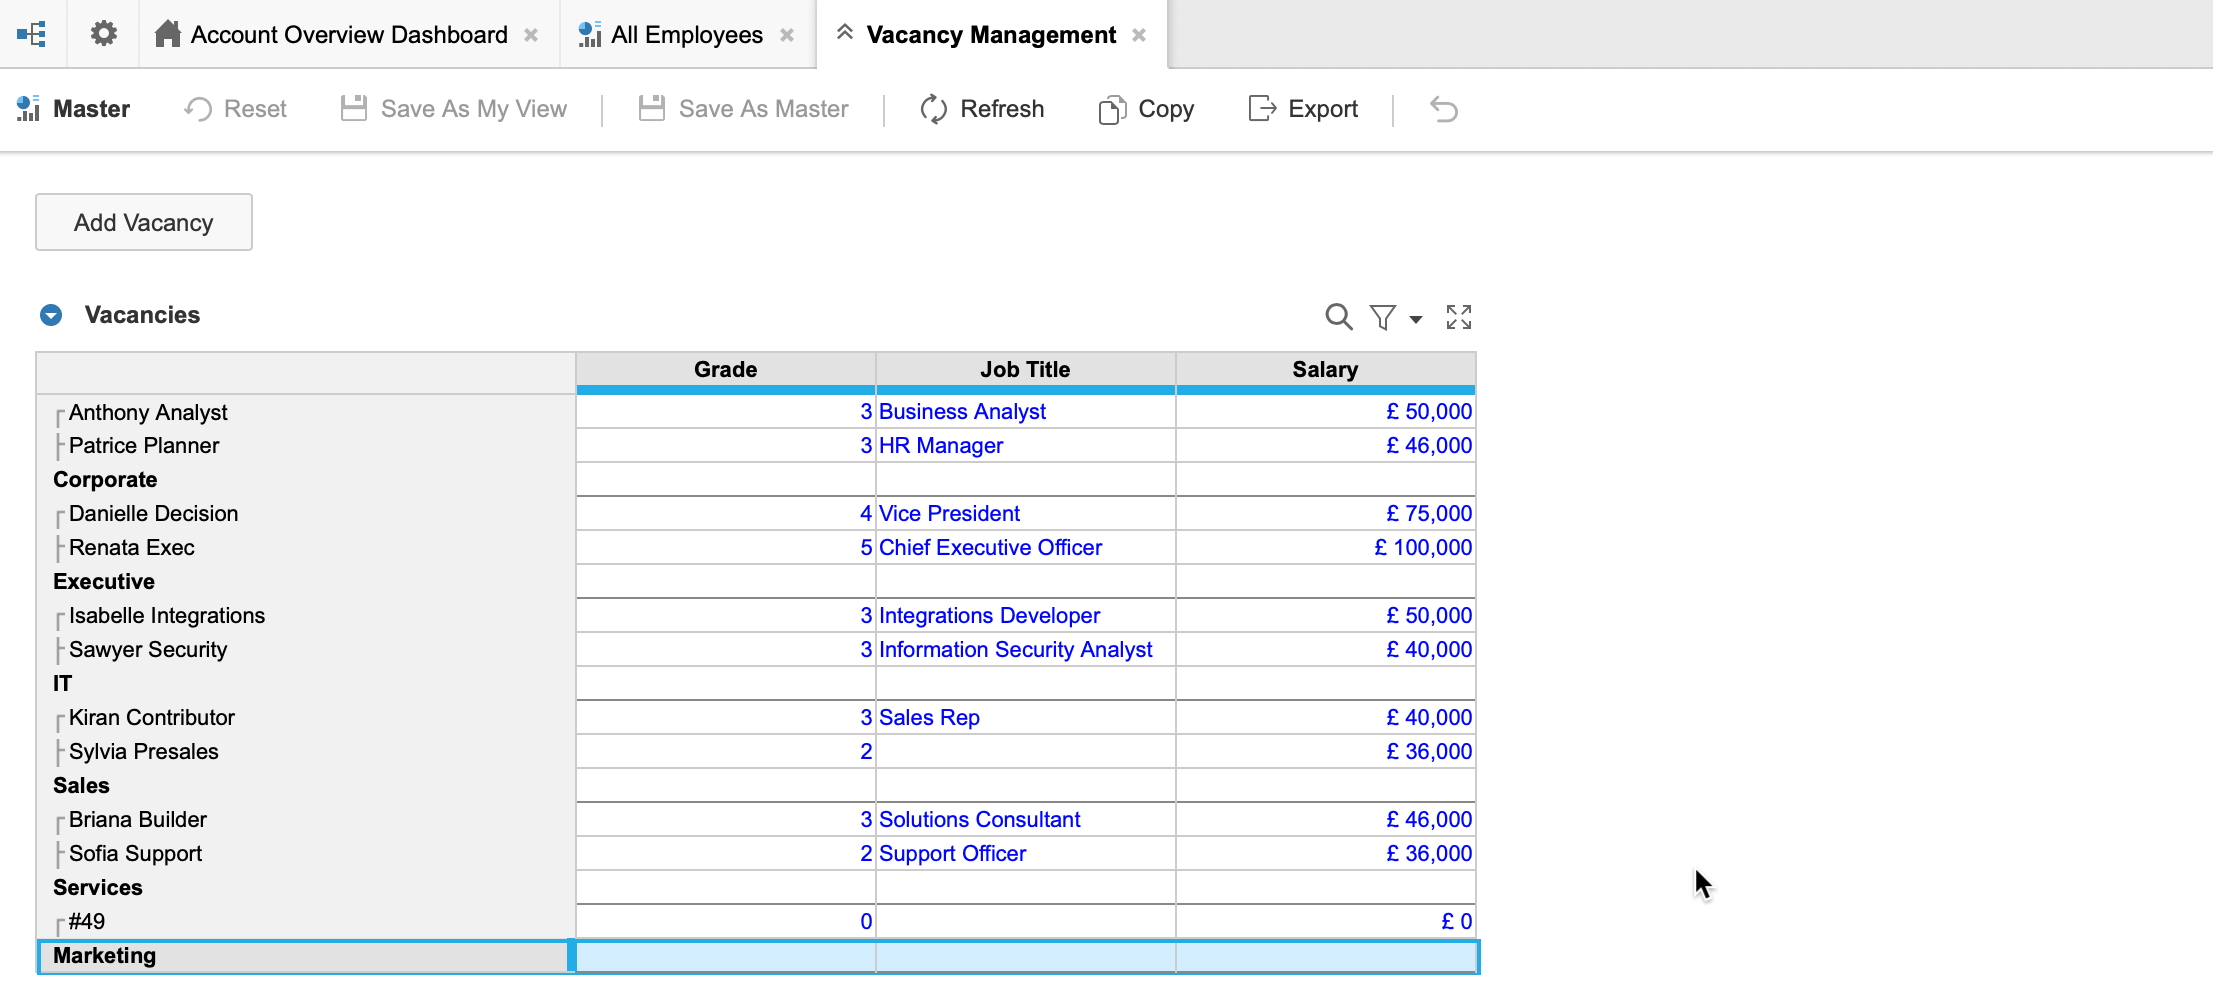
The HR administrator can now enter the other vacancy details in the Vacancies gird.
Example: Add new employee with details and prompts
An HR manager needs to be able to add new employees and enter employee details. They want to add employees from their Resource Management planning dashboard, then enter employee details on a dedicated Add New Employee dashboard. They also want to assign new employees to the store locations in which they'll work.
Create an #Employee numbered list with Locations as its parent list. Add a new Add Employees dashboard and publish components for employee details to the dashboard, such as:
- the Display Name property of the #Employee list
- line items for the employee's Grade, and Start Date
- the grid view of the #Employee list
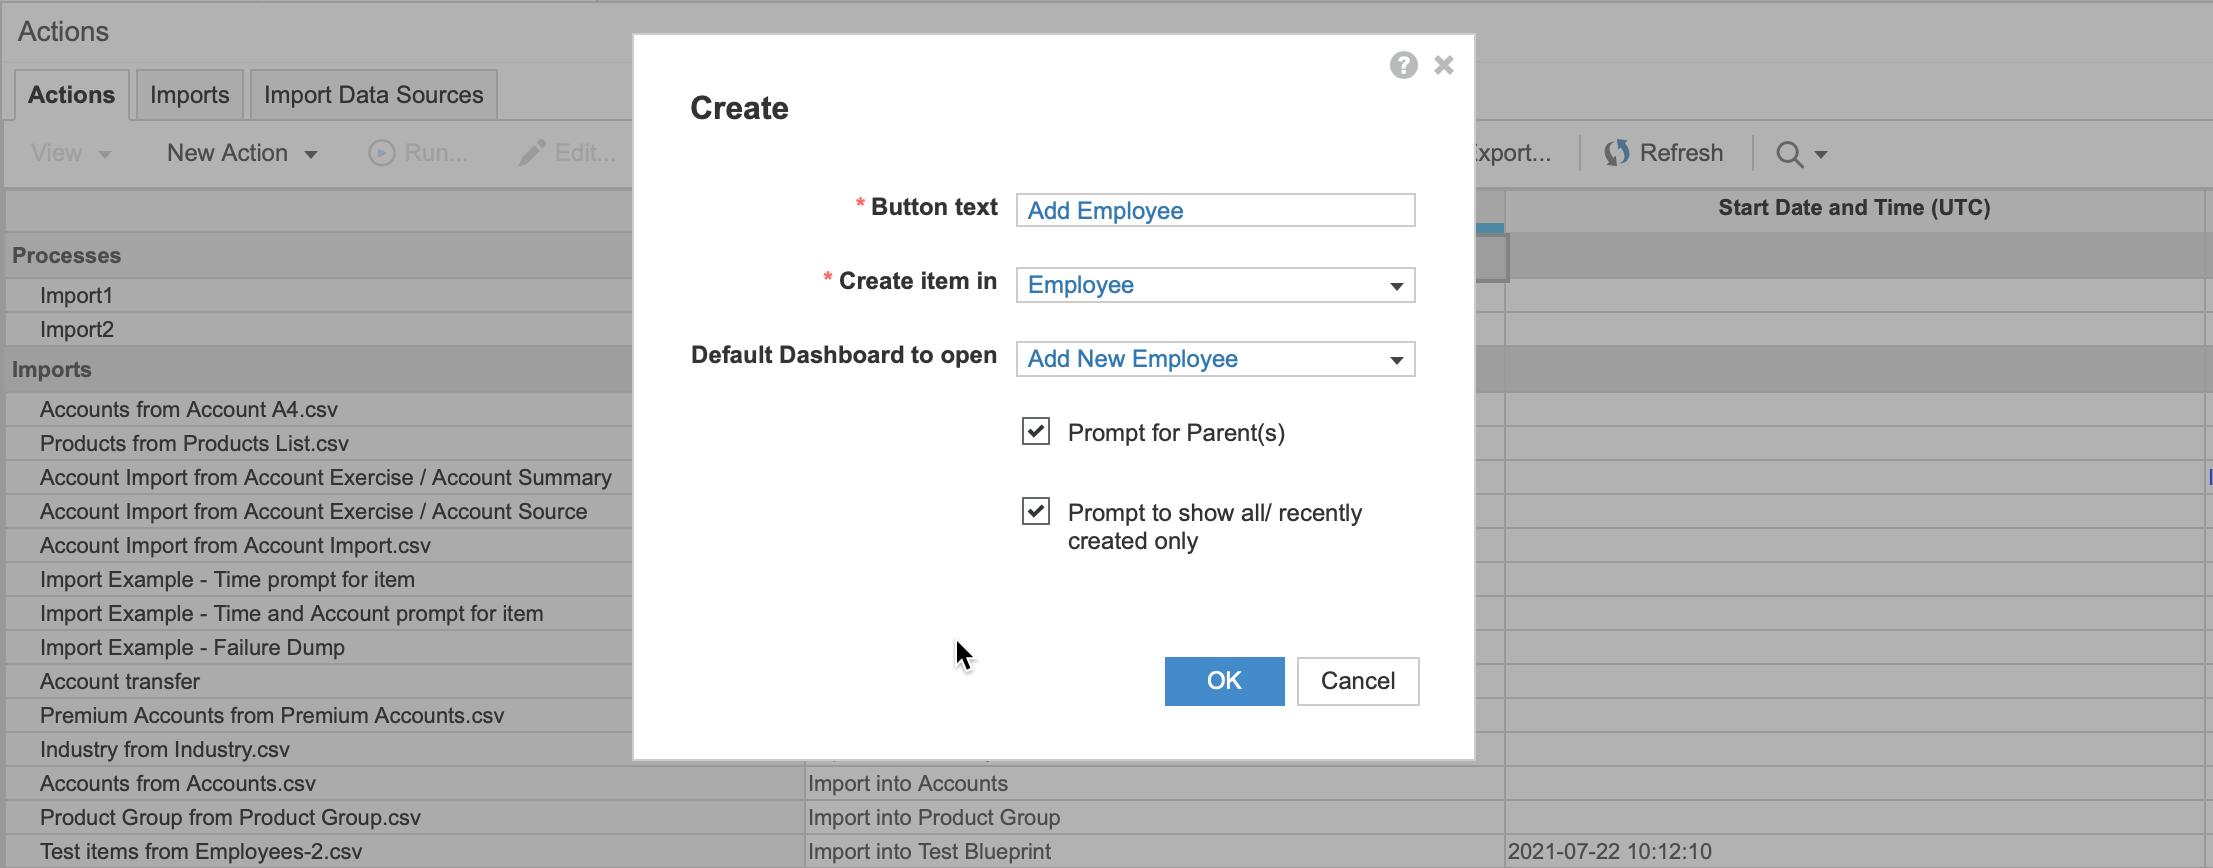
Set up an Add Employee create action to add a new items #Employee. Configure the action to open the Add New Employee dashboard. Select Prompt for Parent(s) and Prompt to show all/recently created only.
Publish the action to the Resource Management planning dashboard.
When the manager runs Add Employee, the action prompts them to select a parent or parents. They can select multiple parents to create items for employees in several locations at once.
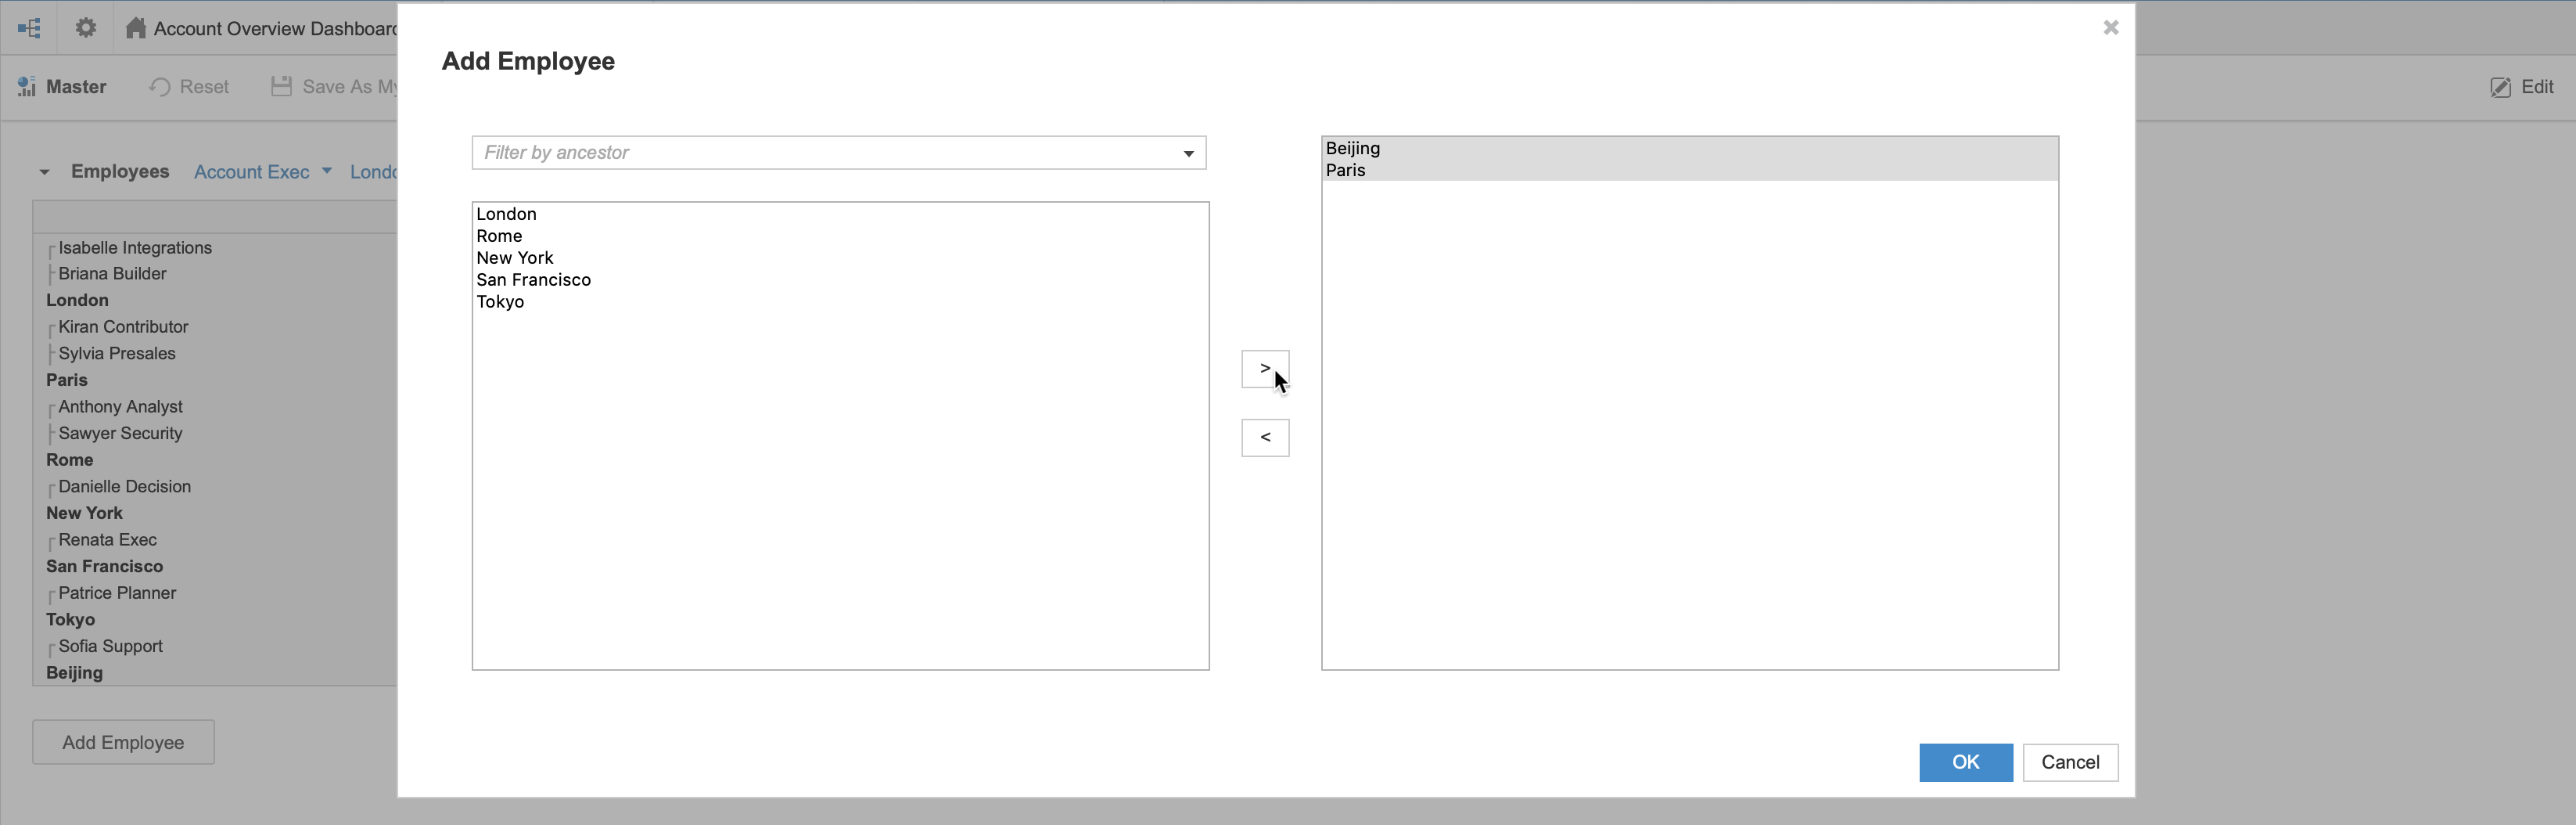
Once you select the parents, the action prompts you to choose whether to show all items. So the manager can select to restrict the items that show on the target dashboard the new items the action creates.
The manager can then enter data for the new employees' name, grade, and start date immediately after creation.

