Use Notification actions in your pages to enable users to email your collaborators on the platform.
You can add notification actions:
- As an action button on an action card
- In the menu of a card
- In the toolbar of a worksheet
You can specify a list of up to 50 recipients or choose recipients using a line item formatted with the model’s user list. The line item must be formatted as Type List, with List set to Users. In this scenario, the notification is sent to the person specified in the line item when your page users submit the action.
You can write a message body of up to 300 characters. When your users select the action, they can change this message, to a maximum length of 300 characters.
When you duplicate an app or page containing notification actions, your configuration changes won't affect the notification actions in the original pages.
Note: Actions are not available on personal pages or report pages.
Create a notification action
To configure your notification action:
- Select Edit this page in the toolbar to open your page in designer mode.
- Optionally, add a new card.
Learn how to add a card to a board or a worksheet. - Choose from where you want to add the notification action. Select:
- Configure action in a new action card, to add an action button to the card.
- Configure actions in the menu of an existing card, to add an action to the card's menu.
- Edit on an action card, to add an action.
- For a worksheet page, you can also select the Configure worksheet actions button in the toolbar.
- In the Actions tab of the right-hand side panel, select the Create dropdown, and select Notification.
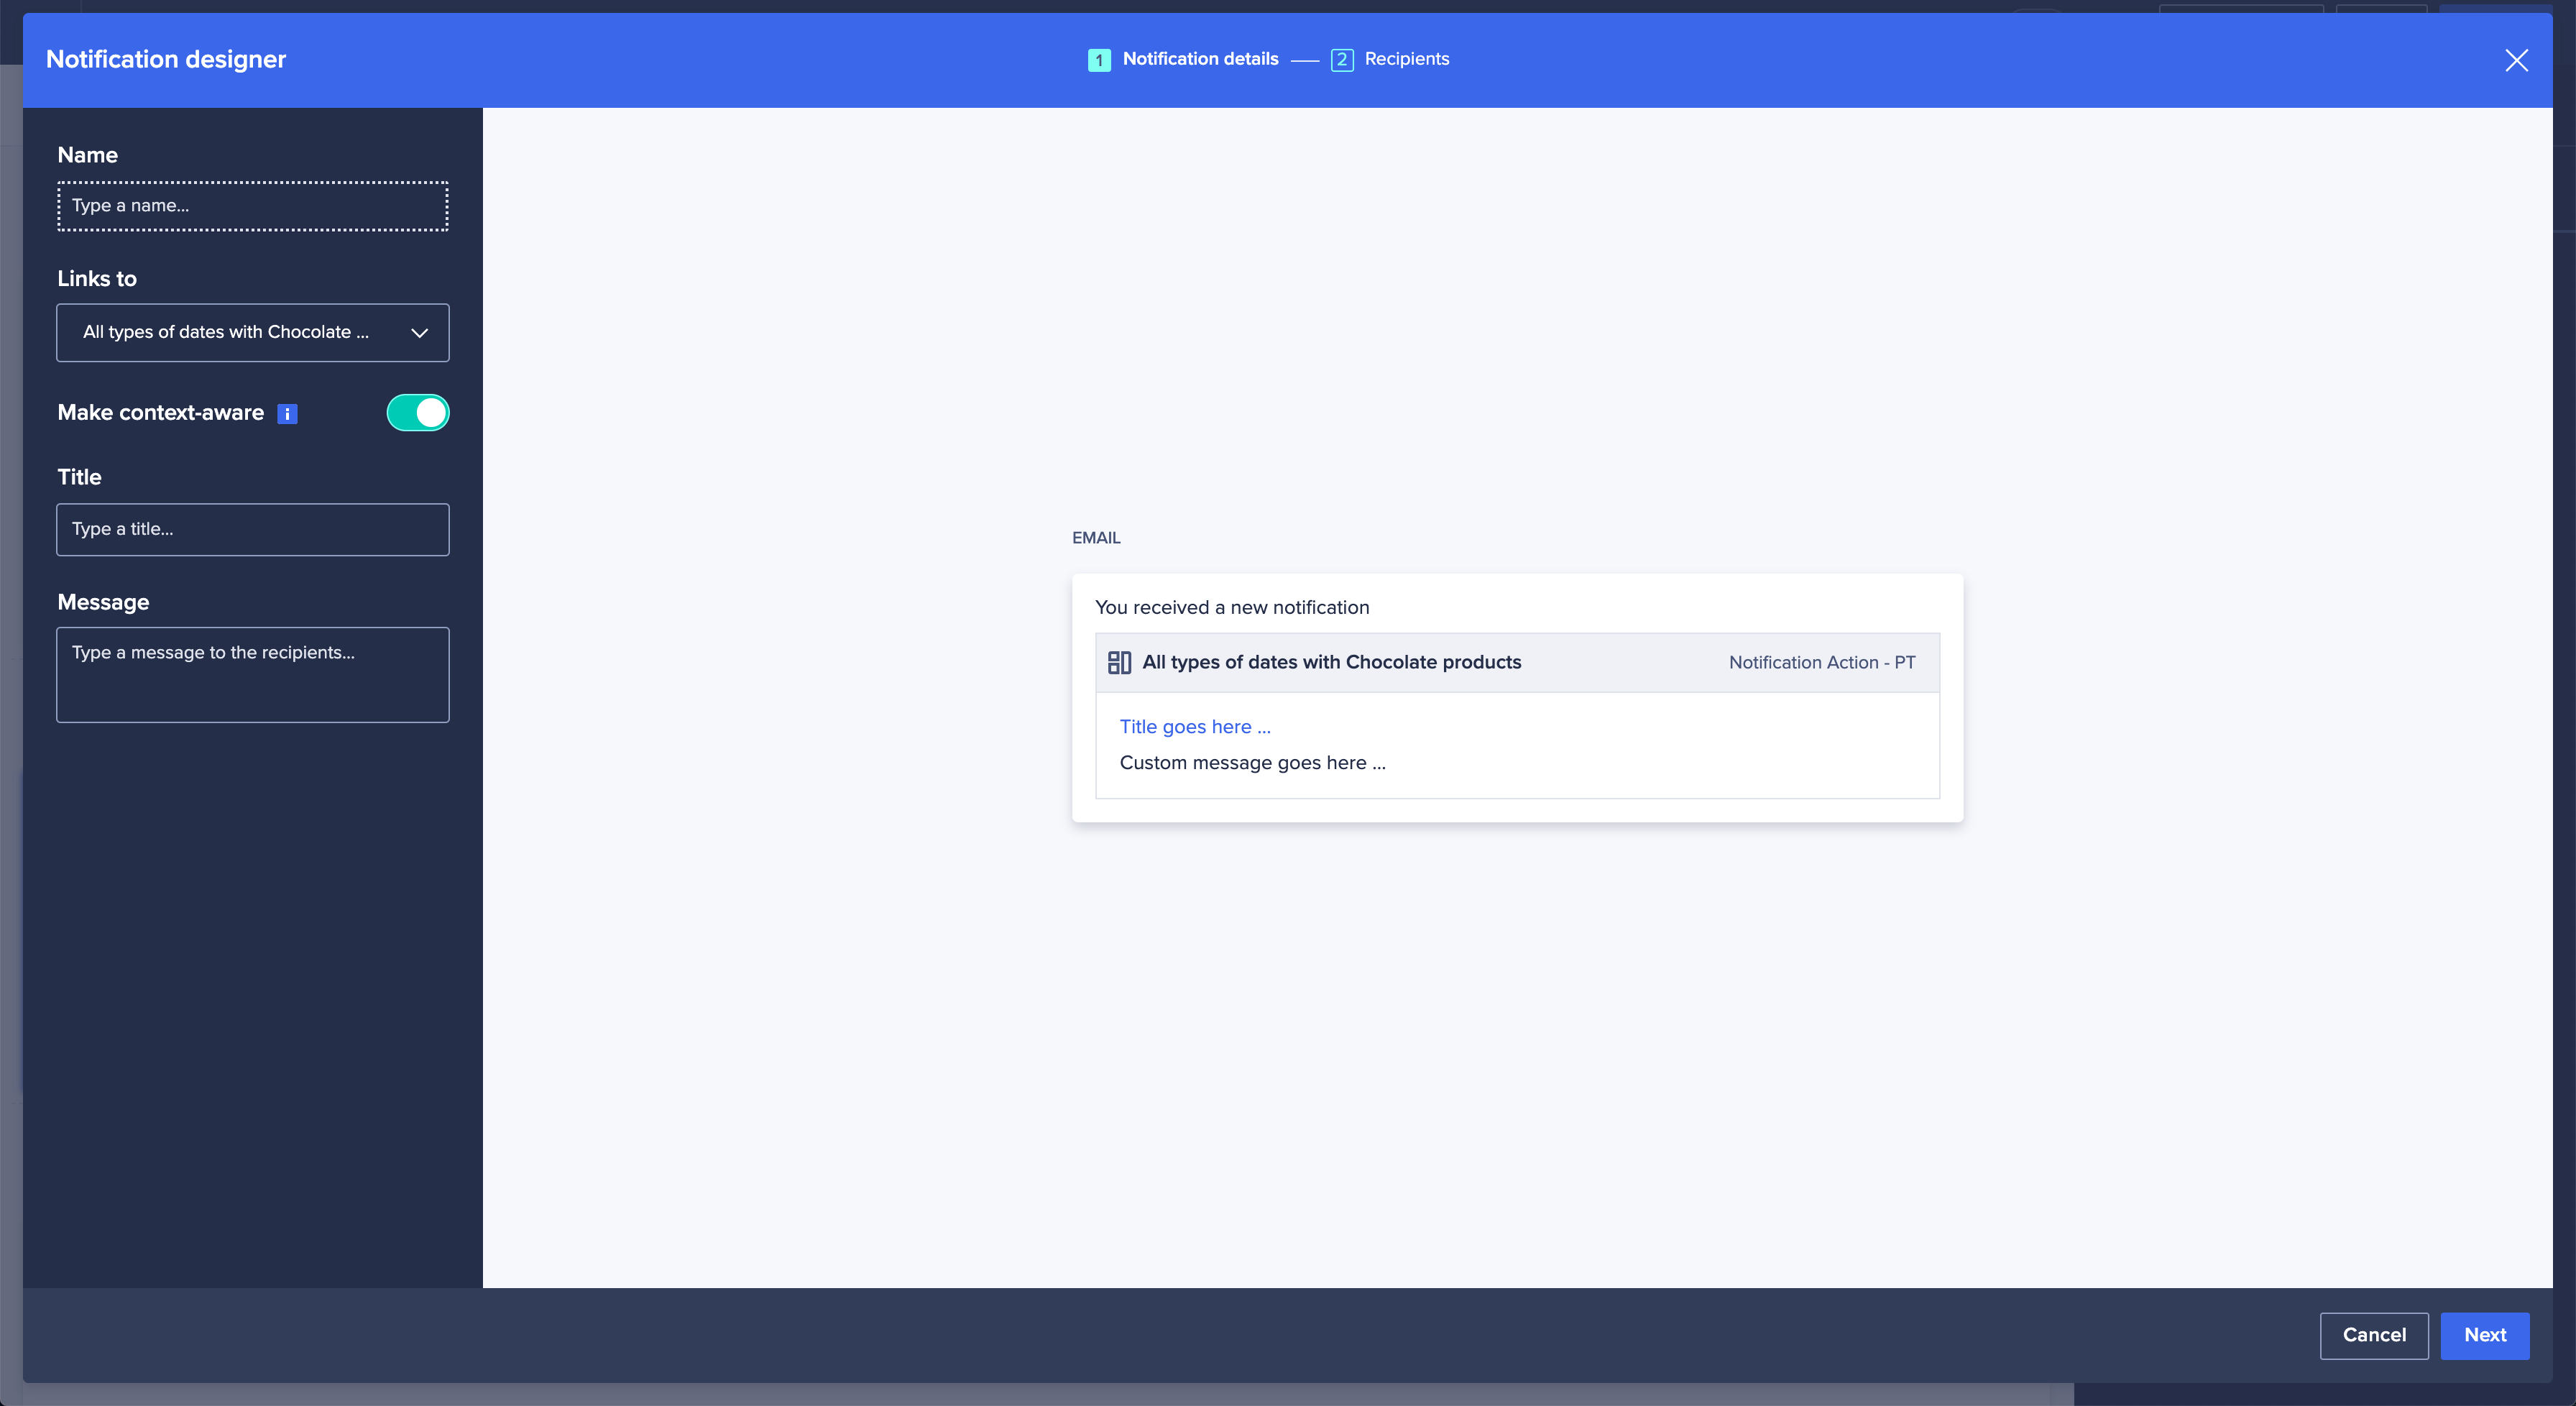
The Notification designer displays. - Configure the content of your notification, including:
- The Name, as the label for your action button. For example, Send approval notification, Remind contributors, Request forecast data, Alert reviewer, or Request budget approval.
Learn more about name conventions for actions. - Links to, as the target page for the link in your email.
- A Make context-aware toggle, to preserve the current context when the notified user opens the link .
- Title, which displays above the message in your email, and links to the page.
- Message, as the body of your email.
- The Name, as the label for your action button. For example, Send approval notification, Remind contributors, Request forecast data, Alert reviewer, or Request budget approval.
- Select Next.
- On the second page of the Notification designer, add Recipients for your notification:
- To select recipients manually, for Assign recipients via, select Specific people, and then add recipients.
- To use a single recipient from module data, for Assign recipients via, select Module data, and then select a Module and Line item. At the top-right of the Notification designer, you can configure the context of the preview without affecting the context of the page or card. Read how to assign recipients via module data.
- Select Create.
- When you're ready, select Publish to make your notification actions available.
You can edit or delete a notification action from its menu in the Manage tab of the Card configuration panel. Read more about how to configure actions on an action card.

