Workspace administrators use the model map to view a model's hierarchal structure. This includes an in-depth analysis of each module in a model.
To open your model map, select Model Map in the model settings bar.
Navigate the model map
Use the toolbar controls to navigate your model map. Use the zoom options () to zoom in and out of the model map, or select 1:1 to return to the default view. Select to see a full view of the model map.
Select or to expand or collapse functional areas in your model. Use the same arrows on individual functional areas to expand or collapse the contents. Modules share the same color as their functional area.
Use the Inset Map in the bottom right corner to move focus and navigate to a specific area on the model map. Select the arrows to show or hide the inset map.
Anaylze modules
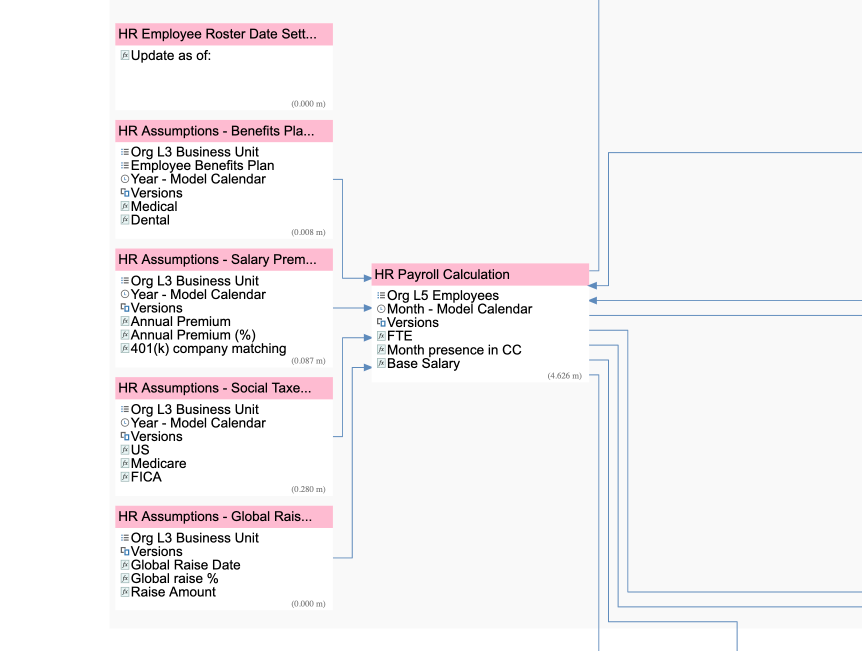
When you expand a functional area or zoom in on the model map, you can view the dimensions that form the structure of each module. You can also see each module's cell count, and blue arrows that represent formulas between modules.
For example, the HR Payroll Calculation module in the Structure: Payroll functional area contains the Org L5 Employees list, the Time and Versions dimensions, and the FTE, Month presence in CC, and Base Salary line items. The module's cell count is over four million.
If you want to view a specific module in the model map, select the module, then select the icon on the far-right of the tool bar. Select Show Selection to highlight your chosen module, or select Clear Selection to return to the default model map view. Select Show All to highlight your chosen module and any other modules it connects to.
Note: Double-click on a module to open the module in a separate tab.
Search for modules and functional areas
Use the search bar at the top right of the screen to find individual modules and functional areas in the model map. Select a module or functional area in the search results to highlight it in the model map.

